How do I fix this problem child?

W

wlewisiii

Guest
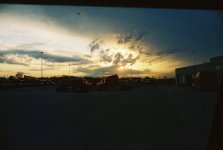
I like the composition, I even like the tonal range overall - it's just a bit too dark & I'm just not conversant enough with CS3 to make it look like I want it too.

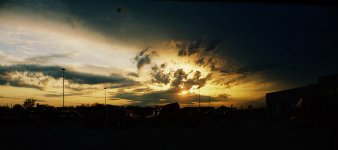
Any suggestions???? Please????

Thanks,

William
 
Everything being "as normal", here's the image that should have been attached the first time... :bang: :bang: :bang:

WillIm
 

Attachments

  • clearing storm.jpg
    clearing storm.jpg
    47.2 KB · Views: 0
um, open CS3, create a new layer at 100% opacity and paste in another image. :)

IOW, I can't really understand what is attracting you to this image. Also, there appears to be a large slab of internal flaring/ghosting whatever on camera right.
 
Yes, that is over there on the lower right. I probably didn't notice it at first as it comes from the curve of the passenger side's front window glass. As a result, it passed slightly below my event horizon on the first pass of the prints.

Yet abandoning the image completely means throwing away the color in the clouds & sunset on the high side up front and center. I'd like to find a way to both crop &, what used to be "dodging & burning" to get it to a spot where other folks can perhaps see what I did that day.

Hope this make some sense.

William
 
I am not very good at digi-muppeting, but "stealing" your image and opening it in PS7, I am able to get something out of the foreground. By using the dodge tool, I can now see the trucks that are parked in the foreground much better. There's probably a some other way of doing this, I am sure. Nice light in the sky by the way!
 
CS2. Cloned out the dirty window spots, and the window frame bottom right. Small adjustments with the Shadow/Highlight dialog. Then again small adjustment of the colour saturation. I'm sure that someone who really understands this stuuf, with a full-sized image to work with, could do a really good job with this. Lovely sunset!
 

Attachments

  • clearing_storm.jpg
    clearing_storm.jpg
    64 KB · Views: 0
Id go for this crop. burned in top left a touch and opened up top right. increase saturationa touch but every monitor is different...borrows the already tweked version posted above. I have to say tho, this is going to struggle to look great when printed due to the shadow explsure being so low to start with. You needed a ND grad at the shooting stage really. still, a team effort improvement?
 
Turtle said:
still, a team effort improvement?

Yes, it certainly is. I thank you all for the ideas & efforts as now I feel like I have a place to start working from.

I think I'll invest in the ND sized for my Symmar rather than on the Bessa, though. :)

Thanks!!!

William
 
Here's my amaturish contribution. Duplicate the layer, set to Multiply and crop to pano.

attachment.php
 

Attachments

  • clearing storm copy.jpg
    clearing storm copy.jpg
    61.6 KB · Views: 0
On shooting the photo (yes, I know that you're asking about post-production) try metering off the dark forground for some detail, then close down by halfstops until you've got your sky exposed properly. You can then pick and choose which exposures you want to use for the different parts of the scene and paste them into layers in PS. Short of a GND filter, this is one of the few ways to handle this much contrast.
 
Back
Top Bottom