
p.giannakis
Pan Giannakis
I had the very unfortunate idea to put a super takumar on my Zenit. As some of you can probably guess it, it got stuck. I spend some time trying to repair it. I took some pictures to make a guide and i am reposting it from my blog, to have it here for future reference.
In my case, the lens is a Super Takumar 35mm f/2. Other lenses will of course be different to dismantle.
Now....
************************* Please read ********************
I am not a technician and neither do I claim to be one. If you decide to follow the guide below, you do it at your own risk and I will assume no responsibility if you damage your lens. If you think you cannot do it, then don't!
******************************************************
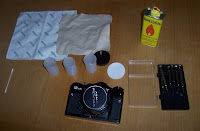
1) Now, taking a lens apart is a 3D jigsaw and you'll need loads of patience and organisational skills. You will need empty film canisters to store the screws and a set of screw drivers. Also you'll need the rear cup of the lens, a cotton pad and Ronsonol to clean the mess afterwards.
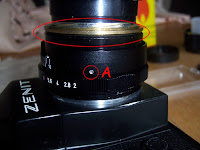
2) Put the cotton pad on the lens and use the rear cup to unscrew the name plate ring.

3) Underneath it you will find three screws. Unscrew them and put the screws in a canister.

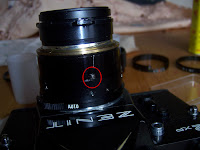
4) Remove the metal bit and you will find three more screws under it. Now those screws hold the focusing ring on the helicoid. Focus the lens on infinity and take a picture of it. This will help you in case your lens gets uncalibrated. Then remove them.
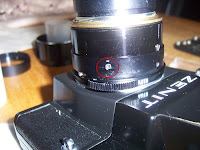
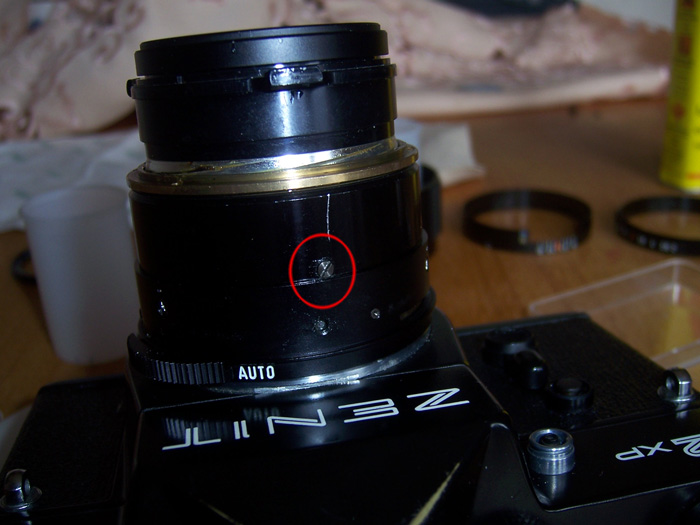
 5) The brass ring on the top is the focusing helicoid. Don't touch that or you risk to uncalibrate your lens ( I did that and it was a pain to calibrate it again.) Now, there are three tiny headless screws around the lens barrel. They are tiny . Remove them and try not to loose them!!
6) Lift the aperture ring carefully and make sure you don't lose the tiny ball bearing that rests underneath it

7) Do not remove this screw. This is for the infinity focus.
8) Remove the three screws that keep the lens barrel to its base.
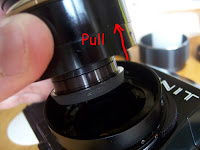
9) Pull it up to lift it.
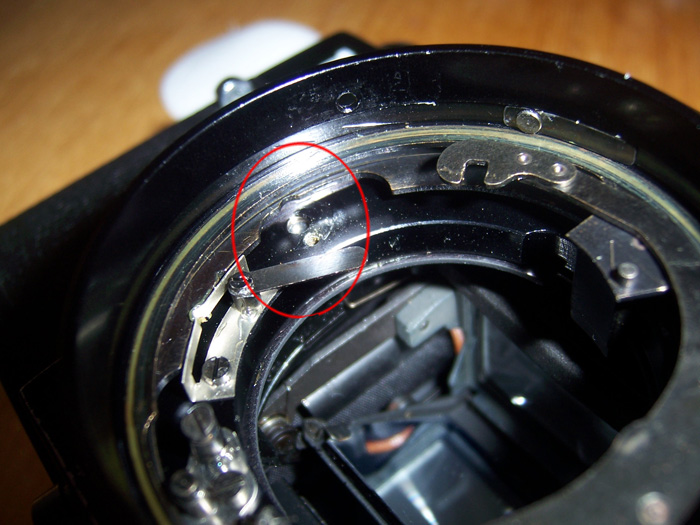
10) Now, here is where all the problem is. In this picture i have removed the pin already (sorry). Just lift it and unscrew the base from the camera mount! Voila !!!
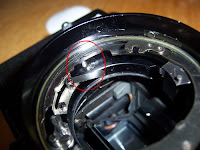
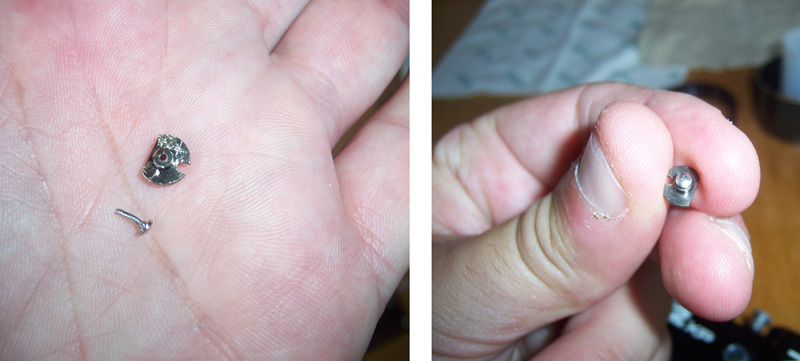
11) Here is the pin and it's holding base. I got rid of my pin since it was damaged already but I put the base back to the lens.

12) See those two screws? Make sure they are well screwed otherwise the aperture will not close.

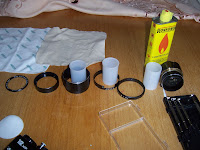
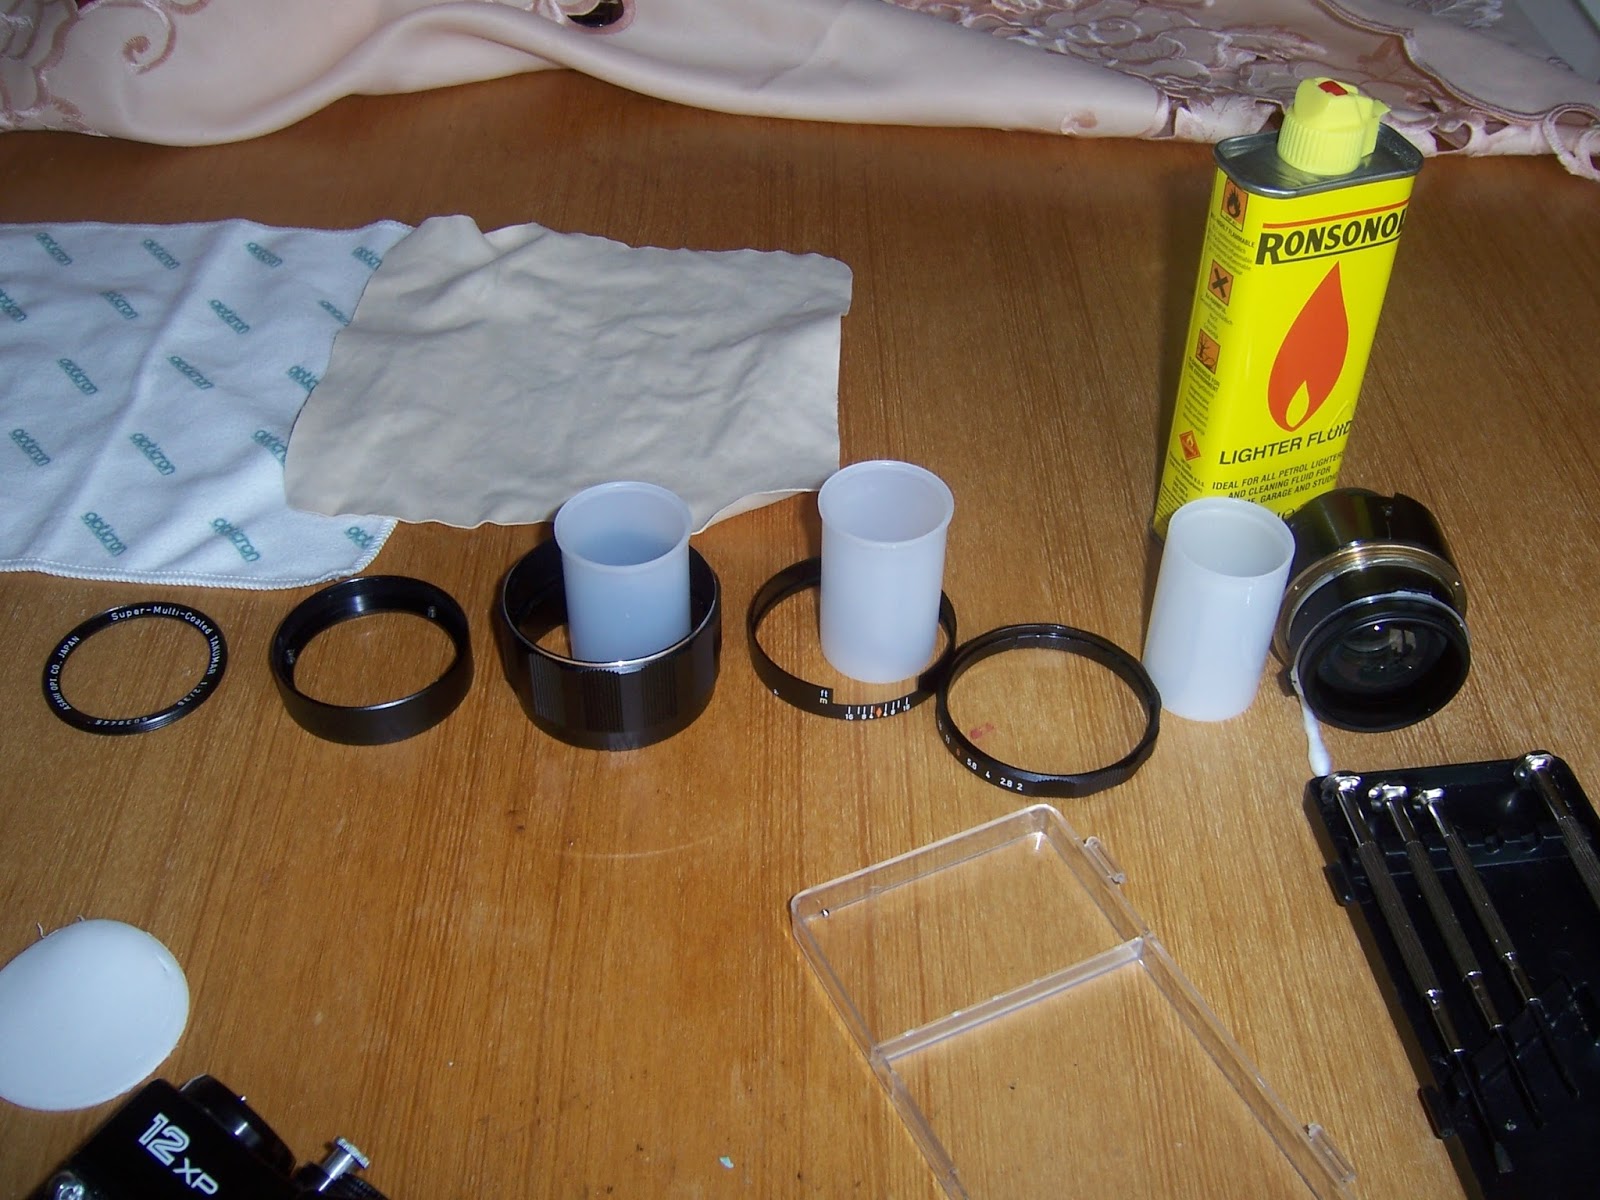
13) At this point, this is how your table should look like. Make sure that you place each part of the lens that you remove next to the previous one otherwise you'll find it difficult to put it together.
Now, as you probably have guessed it already, to put the lens together you need to follow the steps from No13 to No1. At the end of it, you need to check to see if your lens focuses properly or not. Mine didn't so I had to go to step No5 and try to turn the focusing helicoid while looking through the viewfinder until it focused on infinity. The problem was that the point where screw A screws on the helicoid was right under screw B which made it very difficult to access. What i eventually did was turn the helicoid a bit so that A is not right below B and lightly screw the focusing ring. Then with a screwdriver push the helicoid until A is under B. Tight a screw well and rotate the focus ring. Now you will be able to screw all screws. I focused on infinity and looked good, then i focused on 1 metre... look good too and i continued with steps No4 to No1.

I hope you're lucky with your 3D jigsaw. I cannot say that I enjoyed mine, it took me 2 whole days to figure out what each little bit is doing. If you really are not into these kind of things, then maybe sending it to a qualified technician will be your better bet. Needles to say, having removed the pin, the lens works fine now on the Zenit.
In my case, the lens is a Super Takumar 35mm f/2. Other lenses will of course be different to dismantle.
Now....
************************* Please read ********************
I am not a technician and neither do I claim to be one. If you decide to follow the guide below, you do it at your own risk and I will assume no responsibility if you damage your lens. If you think you cannot do it, then don't!
******************************************************
1) Now, taking a lens apart is a 3D jigsaw and you'll need loads of patience and organisational skills. You will need empty film canisters to store the screws and a set of screw drivers. Also you'll need the rear cup of the lens, a cotton pad and Ronsonol to clean the mess afterwards.

2) Put the cotton pad on the lens and use the rear cup to unscrew the name plate ring.

3) Underneath it you will find three screws. Unscrew them and put the screws in a canister.

4) Remove the metal bit and you will find three more screws under it. Now those screws hold the focusing ring on the helicoid. Focus the lens on infinity and take a picture of it. This will help you in case your lens gets uncalibrated. Then remove them.


6) Lift the aperture ring carefully and make sure you don't lose the tiny ball bearing that rests underneath it
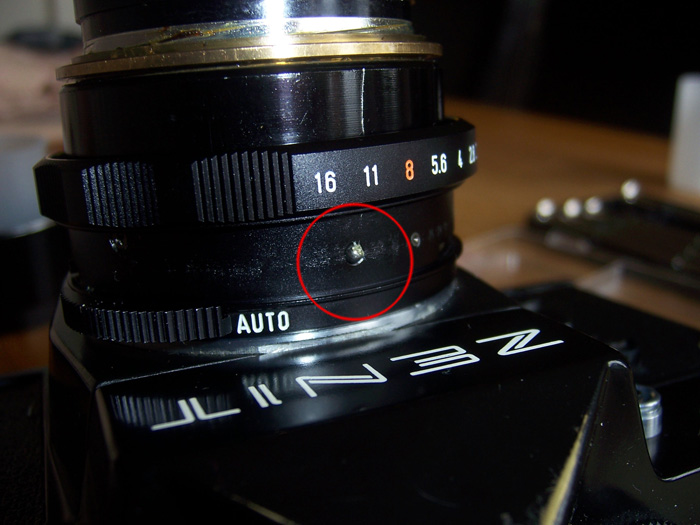
7) Do not remove this screw. This is for the infinity focus.
8) Remove the three screws that keep the lens barrel to its base.

9) Pull it up to lift it.

10) Now, here is where all the problem is. In this picture i have removed the pin already (sorry). Just lift it and unscrew the base from the camera mount! Voila !!!
11) Here is the pin and it's holding base. I got rid of my pin since it was damaged already but I put the base back to the lens.
12) See those two screws? Make sure they are well screwed otherwise the aperture will not close.

13) At this point, this is how your table should look like. Make sure that you place each part of the lens that you remove next to the previous one otherwise you'll find it difficult to put it together.
Now, as you probably have guessed it already, to put the lens together you need to follow the steps from No13 to No1. At the end of it, you need to check to see if your lens focuses properly or not. Mine didn't so I had to go to step No5 and try to turn the focusing helicoid while looking through the viewfinder until it focused on infinity. The problem was that the point where screw A screws on the helicoid was right under screw B which made it very difficult to access. What i eventually did was turn the helicoid a bit so that A is not right below B and lightly screw the focusing ring. Then with a screwdriver push the helicoid until A is under B. Tight a screw well and rotate the focus ring. Now you will be able to screw all screws. I focused on infinity and looked good, then i focused on 1 metre... look good too and i continued with steps No4 to No1.
