M8 IR Step-by-step
M8 IR Step-by-step
Hi Dave, thanks for your kind comments.
Think it's a good idea to share the step-by-step of the work-flow....may not be the best but it works
😉
Software used:
a) LightRoom 2 for importing of files from the SD card. Actually any photo editor with WB adjustment can do.
b) GIMP version 2.6.x : freeware !! You'll need this for Channel Mixing.
I've chosen an example photo for walking through since it has typical white leaves from foliage.
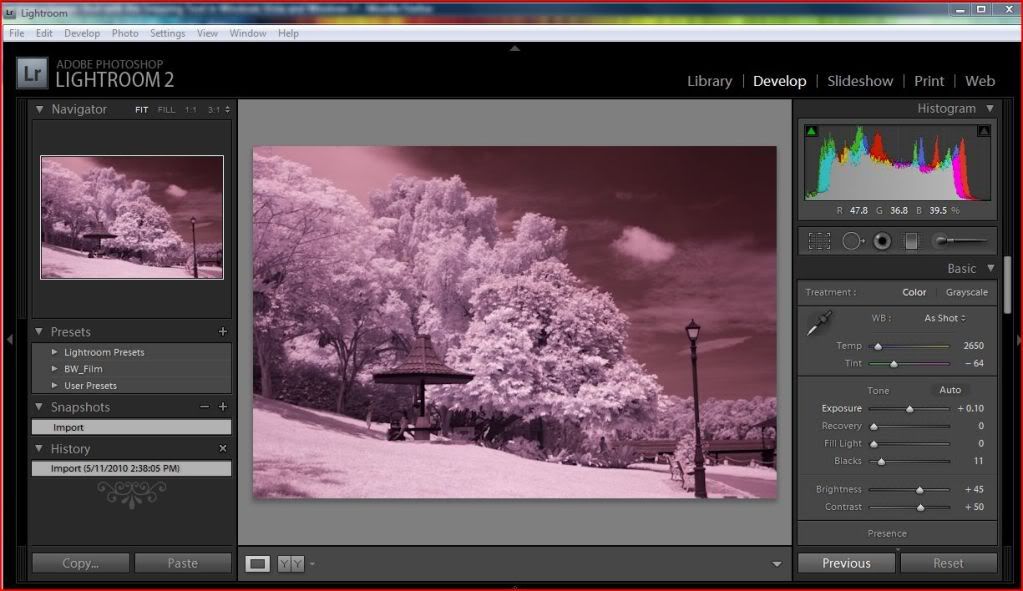
1) Shoot in RAW. Through the dark red Hoya R72 filter, everything is captured as reddish.
- Import into LR2.
2) Use the whitebalance tool to select a point for which determines your WHITE point. In usual cases, choose a point within the green leafy foliage.
- in this photo it's the leaves in the middle of the picture
You can see a preview on the smaller window.
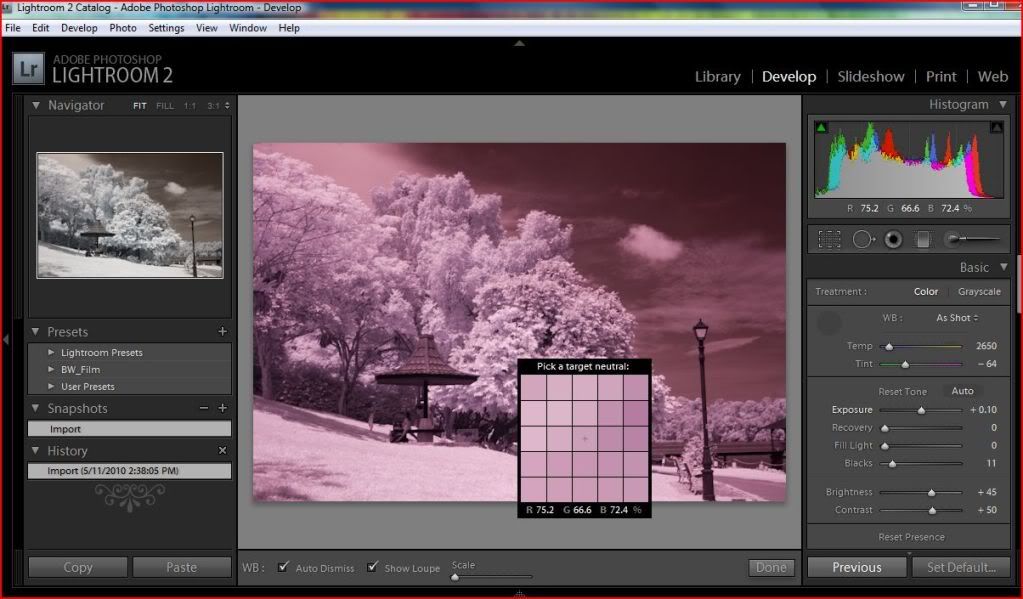
3) This is the result in LR2 before exporting to external editor (GIMP). Some of you may use Photoshop CS.
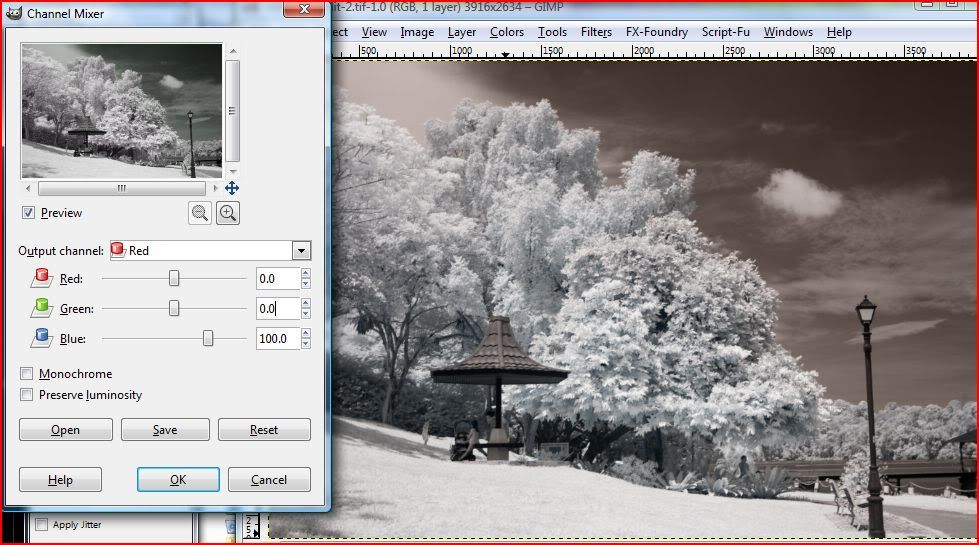
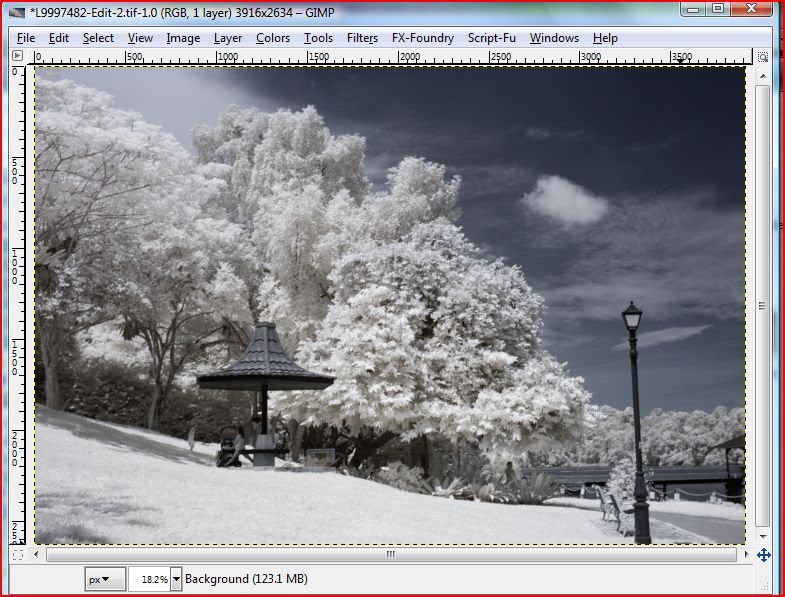
4a) In GIMP, open up the channel mixer.
-> Colors -> Component -> Channel Mixer
The first output channel you see is RED.
4b) Slide the "Red" slider to 0, and slide the "Blue" one to 100
- see the preview on the smaller window?
- You shd get the output as seen in the preview window
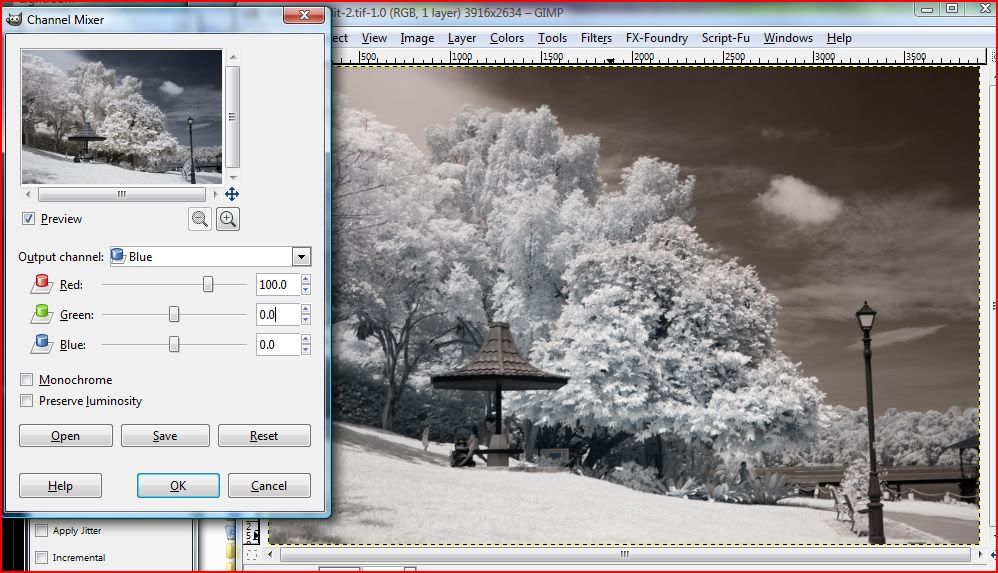
5a) Now click the dropdown box and select the BLUE output channel.
5b) Do the vice versa. Slide the Blue slider to 0, and the red one to 100.
6) That's it!
After this step, you may want to adjust the curves to your taste.
I felt the most important step is to get the original WB correct which is easy to do if you shot in RAW/DNG.
Hope this helps
🙂