Hello all,
note: if you follow LFF forum you might have seen this post. I ended up talking to those folks as they handle more large printing than we do small and mid format shooters it seems.
I just realized I forgot to update this thread with what the outcome was and so quickly came back to put a conclusion to this all.
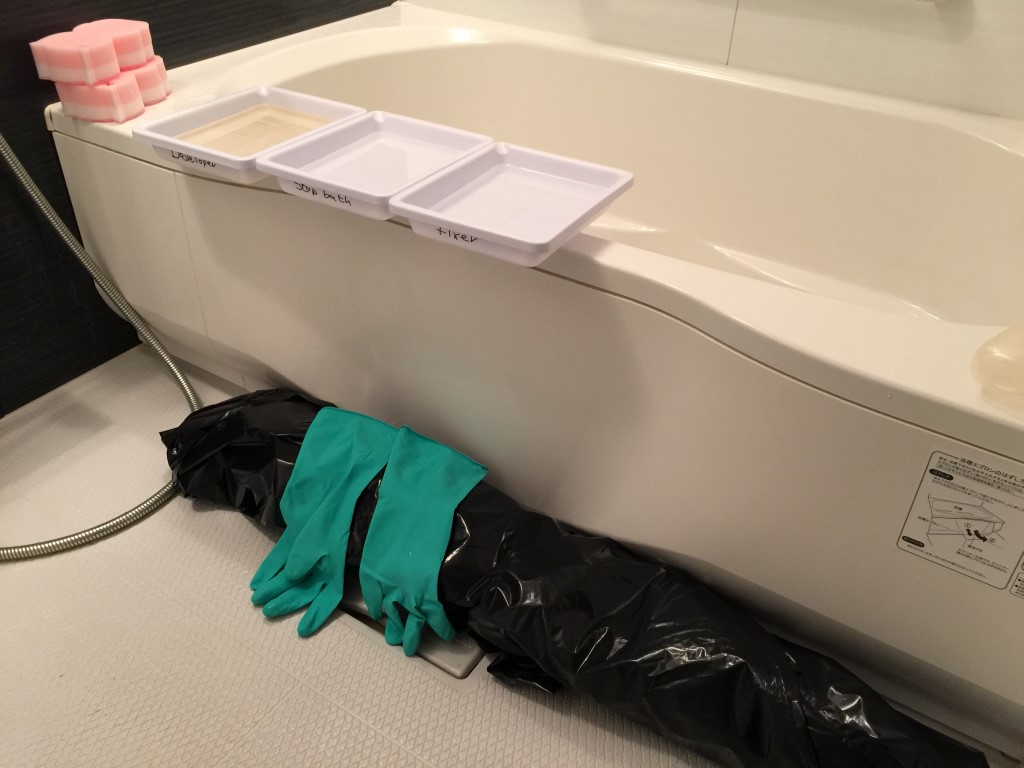
I managed after all a 1 meter by 1 meter final print and I ended up processing it on the floor of our bathroom with sponges and a mere 500ml worth of developer.
Time will tell if the fixing I did was okay, it was also only 500ml but i kept going at it for 10 minutes with the sponges collecting the excess fixer from places and redistributing it to the rest of the print continuously.
I also did a test print a month earlier of my son which had lots of developing errors mainly I think because I used a rubber glove and I had to put my weight on the paper at times and perhaps the rubber left some residue that prevented developing? The print if I look at it closely has marks that could resemble my fist.
Long story short it all worked out great and I ended up spending hours looking at it over the course of two weeks while the print was still with me hanging in my darkroom.
Here are a few pics from the session - hope you enjoy looking at them as much as I enjoyed making them.
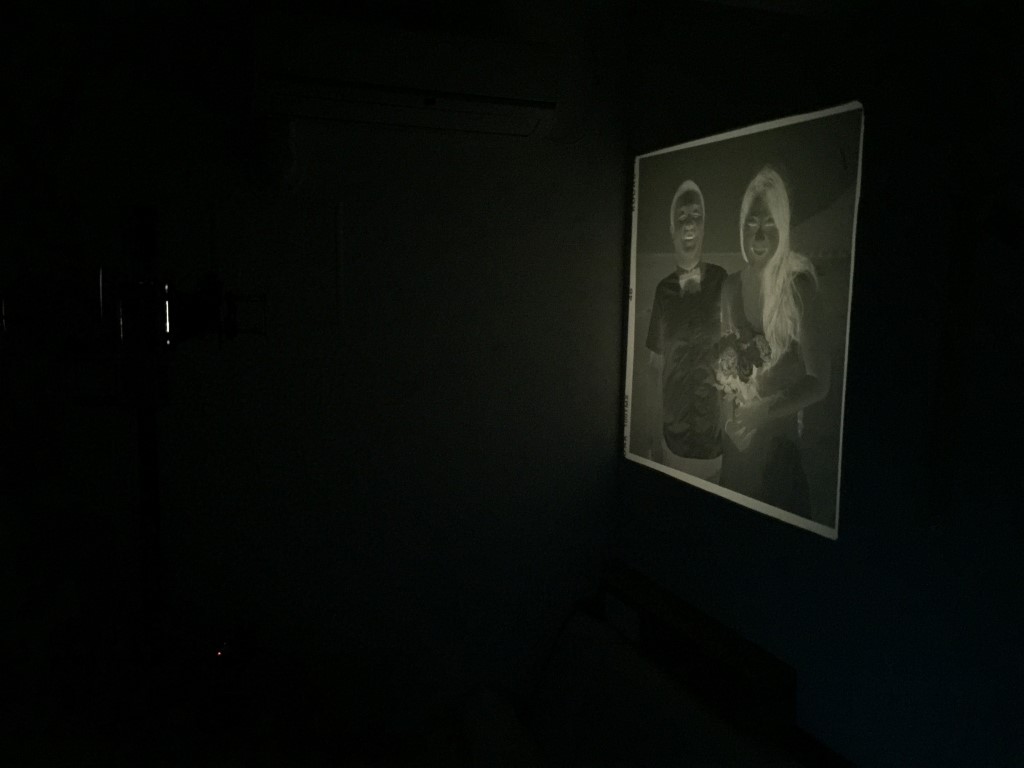
It was for a good friend of mine who got married and the photo was exhibited at their wedding party and is going to be framed and displayed in their apartment.
Thanks,
Ben
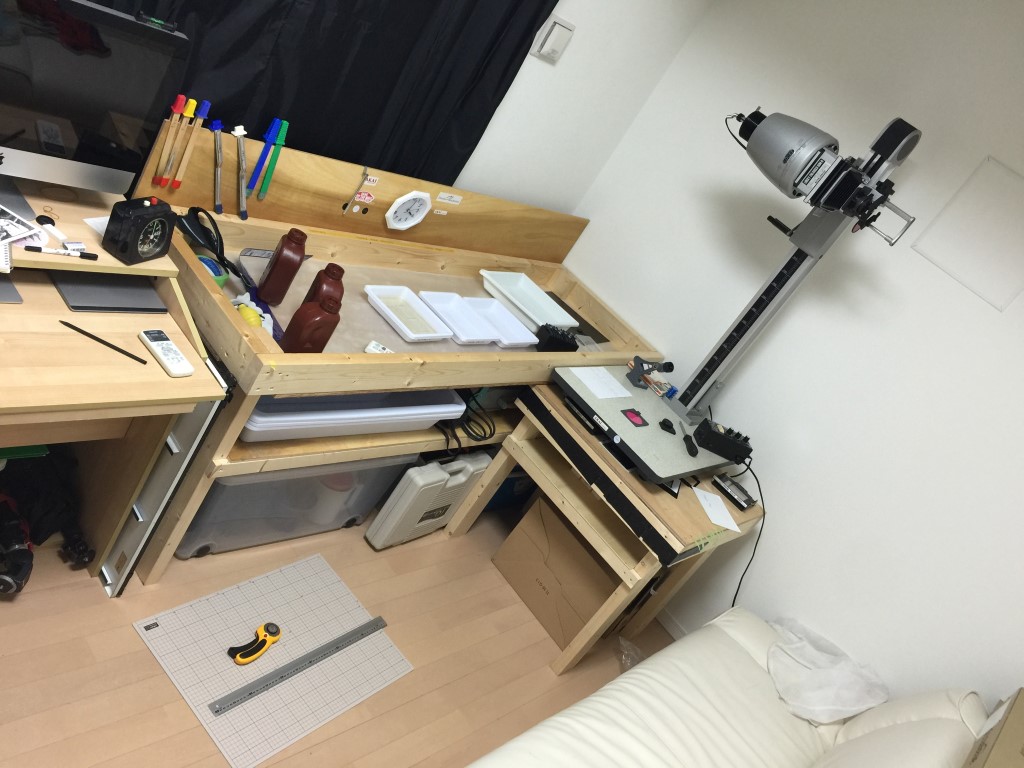
This is my darkroom set up for the printing. The head is turned and I have some small trays with developer / stop / fixer for the test prints. I did about 10 sheets of 5x7's at various different places of the print as well as a full print of 20x20cm to have a sample to see what tones I need. This sheet of 20x20 was always beside me and as I printed the test strips - I checked if the tones looked the same.
Then the light goes off.....
As I can't process the print in the darkroom I ended up rolling it up after the exposure and putting it into 5 black vinyl 90liter garbage bags. I came up with the number 5 after I started wearing these bags one at a time and looking straight into a bright light to see if anything comes through. After I put the 4th bag over my head I saw absolutely nothing so I added one extra for the sake of being on the safe side and it worked. I transported the image to the bathroom in the bags and moved the developing essentials / safe light etc. Once it was all dark, I removed the bag - just to find I had absolutely no idea what to do with it The little things....
Japanese bathrooms are made of plastic completely so it's perfect for a job like this and they are totally sealed and have a permanent vent taking air out. But its tiny and the paper takes up all the space on the floor so I really had a hard time with those 90liter bags - they ended up going over a rack above the bathtub.
This is the test print and you see the area I have for this job. The developer / stop / fixer were just poured over the paper and I used the sponges to continuously spreading them. Once done I showered the whole print off and came the next chemical etc until I had it totally fixed.
Once all done I put the paper on the bathroom's wall and showered it for 10-15 minutes while continuously massaging it with one hand until the stickiness was all gone.
Then came the actual print a month later. This is the end result with all the test papers placed on top for illustration. Some blend in so much it's hard to spot. I think I had 5 final test strips on their faces / clothes / flower bouquet etc.
This is the washed and dried print as it was hanging in my darkroom for weeks. You can see the size of it - compare it to the 21inch iMac right below.
This is again the final print with the rolleiflex I used when taking it and a roll of TMAX.
And again - just to show the sheer size.