
bitfeng
Well-known
Dear All,
Sorry for reposting but just haven't heard any reply in the repair forum.
I need some guidance on removal of this Rollei35S' shutter lever "boomerang" (see attached pic - circled in red). In order to loosen the screw, should I try to turn it counterclockwise or clockwise? I tried counterclockwise but it seems to be fairly tight. Should I hold the "boomerang" when loosening the screw or just let it go?
Thank you very much in advance.
Feng 😕
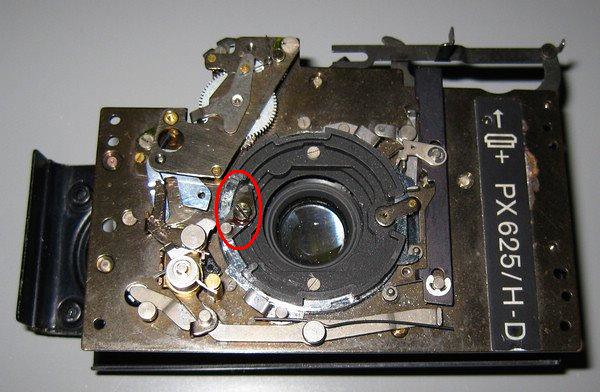