
Dan
Let's Sway
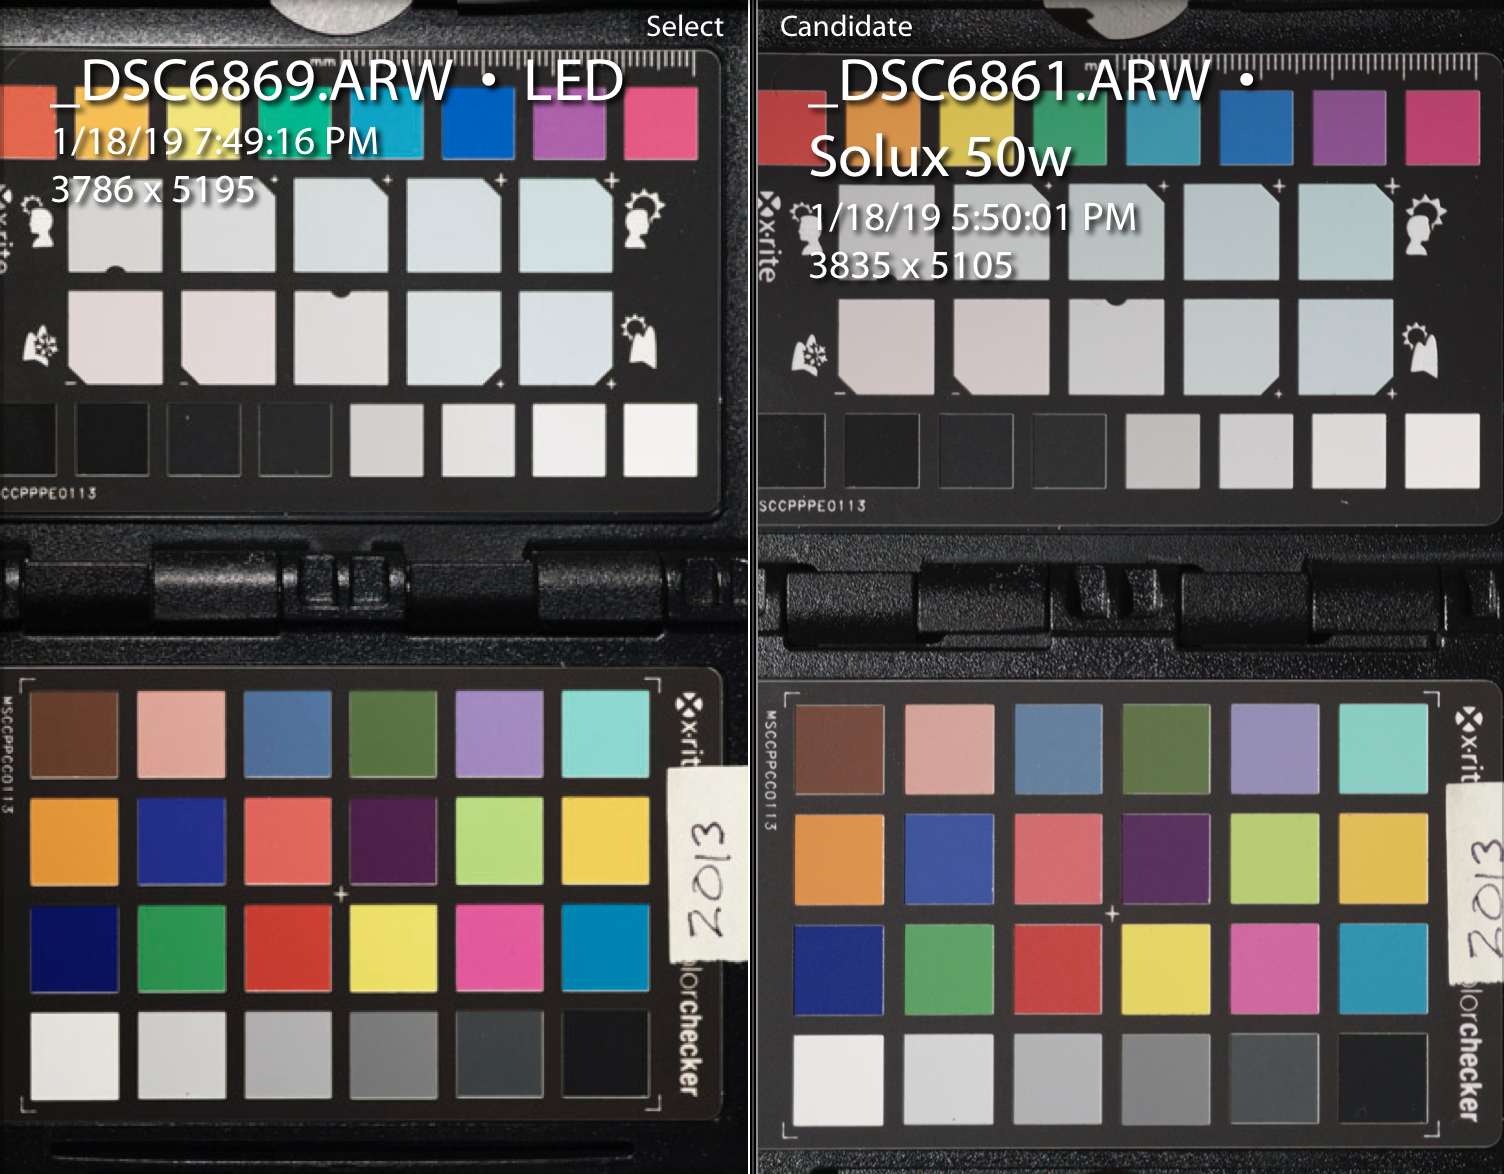
I see some dust problems above.
er, more like land erosion problems 😀
I see some dust problems above.
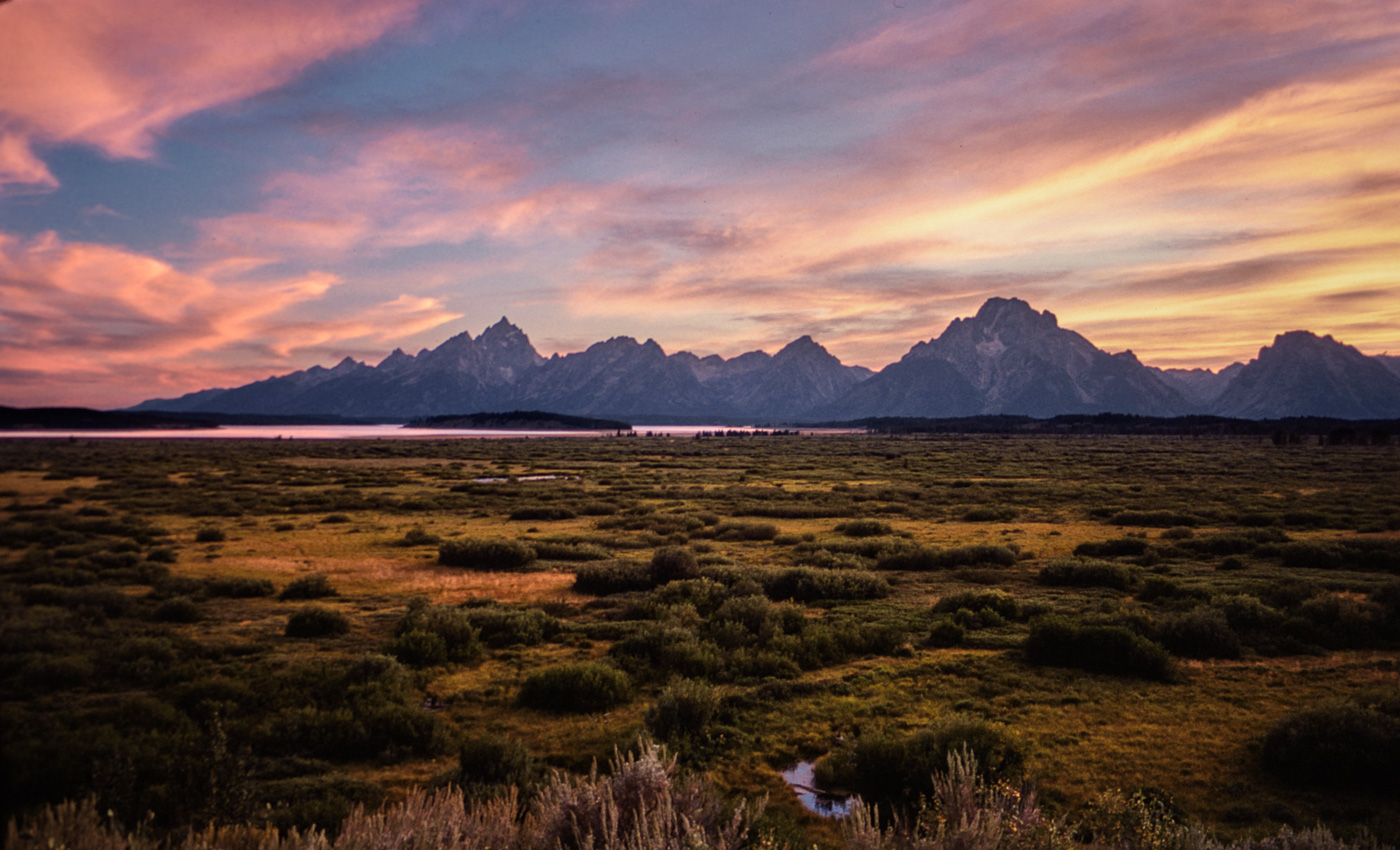
wow impressive results.
I can't compare it to the color checker but from the image I'd rather go with the LED source. The blues and the orange seem to be more saturated and more to my liking.
Or is this rather due to the different exposure?
in either way it might be good to compare some "real" slides with both light sources : )
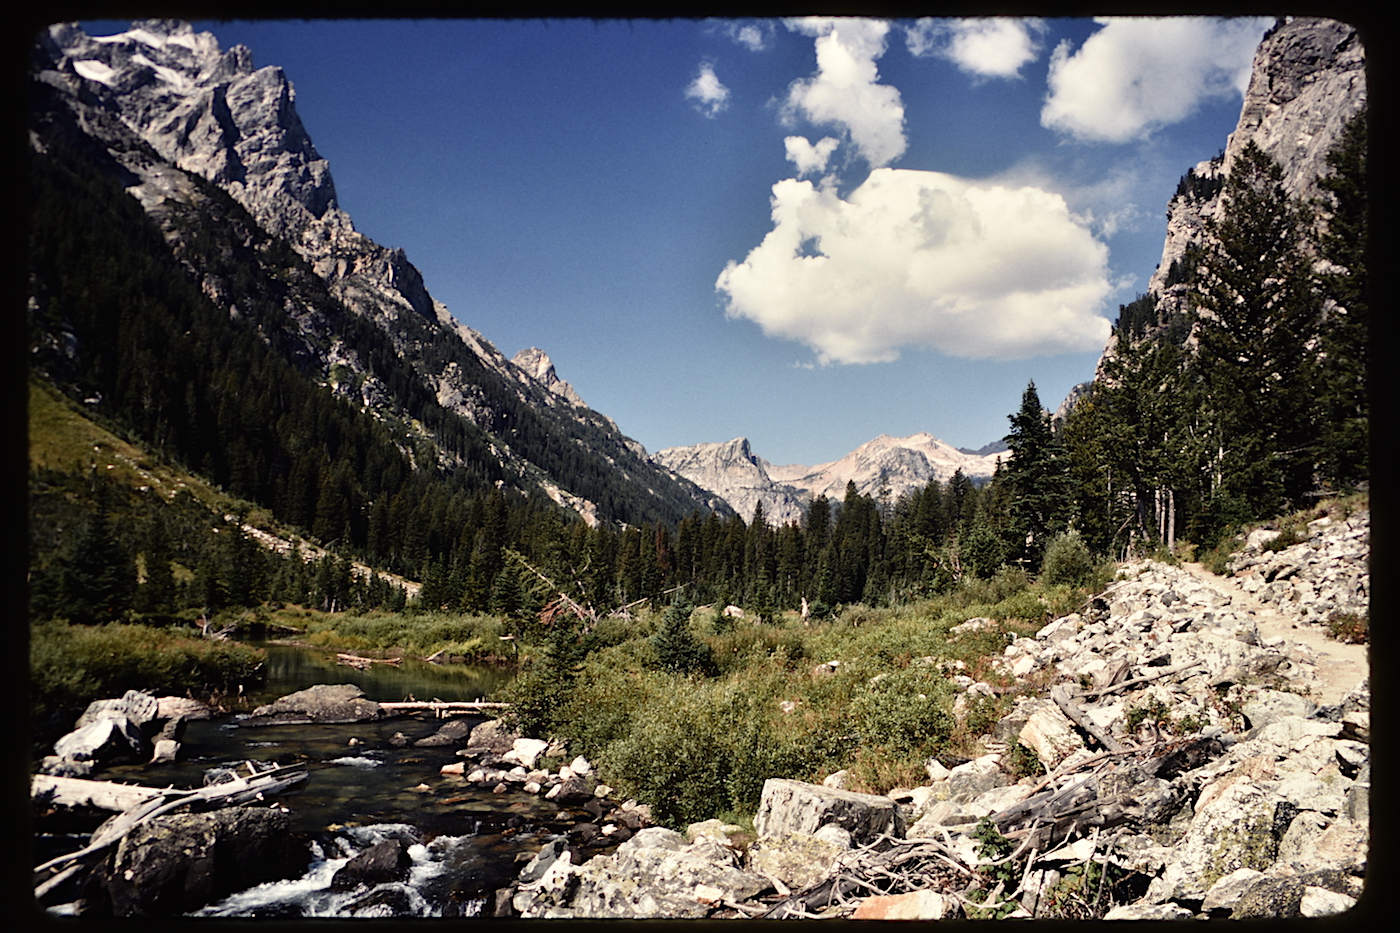
Here's a sample, a Kodachrome from 1977, in the Grand Teton National Park. Camera-scan of my slide in my modified projector, shot with 24MPx Nikon D7200 and 105mm f/2.8 Micro-Nikkor. This is the straight out of camera jpg.
Here's the example in full resolution, straight out of camera. If you view at 100%, you'll see that there isn't 24MPx of real data in the image; probably more like 6-10MPx.
... do you plan to digitize your whole slide archive with this set-up?
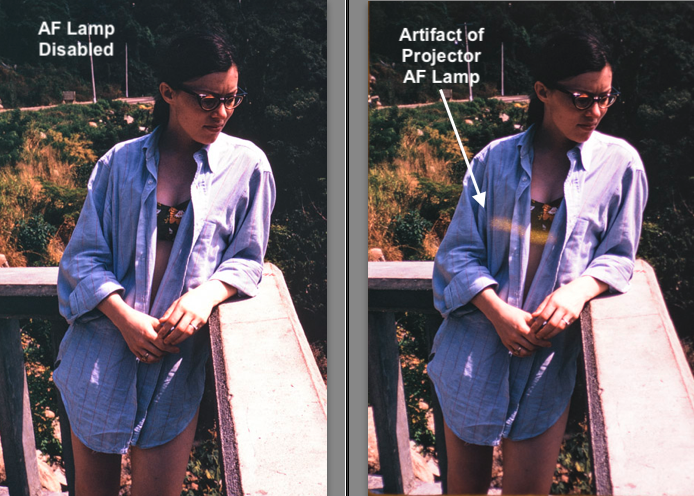
What about the "automatic" mode with both timer on the Carousel and the camera?
However, viewing it full res, on this monitor at least, I don't see the detail of the dye clouds clearly...
Thank you for this comment. I don't see them either.
Thank you for this comment. I don't see them either.
I'll investigate. Quick google says the dye clouds are 1.25 to 4 microns. I highly doubt I can resolve these in my 24MPx crop sensor body (pixel pitch 3.9 microns and my shots are at magnification 1:1.5). And, from the measurements at CoinImaging.com, it appears that my 105mm lens will only resolve details at about 8 microns (at this magnification).
Hard to decide how much detail to try to include in these camera scans. I have been guessing that 35mm chromes would deliver up to 10MPx, and I have 20+ in these camera-scans. I might try greater magnification and stitch to see if there is more.
Thanks for the question. Will do some more with this.
However, viewing it full res, on this monitor at least, I don't see the detail of the dye clouds clearly.