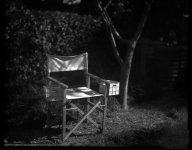
Joe - bravo! Could you explain the pre-flasing procedure for us, and the reason for it?
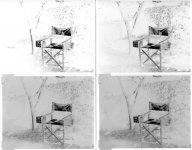
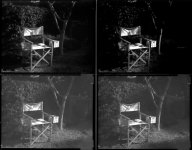
I preflash not as much to increase the paper's speed, but to improve shadow detail without blowing out the highlights; that is, to tame high-contrast light.
I use a slight, even exposure from a dim 7.5 watt bulb that would yield a faint, gray tone on the paper if then immediately developed. This faint exposure adds to the camera's shadow detail exposure (which is just below paper white in a negative image), helping to improve the shadow detail. But the highlights are virtually unaffected, since each step in the zone system is logarithmic, such that the faint preflash exposure adds very little density to the highlights.
Another useful aspect of photo paper is the difference between VC paper and graded paper. Graded paper is UV/blue sensitive only, and of a fixed contrast. VC paper has two components to its emulsion, a high contrast blue sensitive emulsion and a low contrast green sensitive emulsion. Since daylight is primarily UV and blue, the use of VC paper as an in-camera negative results in excessively high contrast images. Thus, I tend to use grade 2 paper for negatives, whose contrast is independent of the scene's spectrum.
As for the "speed" of paper, I've run calibration tests on my paper, setting up the darkroom in the daytime, making a series of exposures outdoors at various ISO settings on my meter, immediately processing them, then examining the resulting paper negatives to see which has the best tonal range and values. My paper of choice (Arista's grade 2 RC paper) I rate at an exposure index of 12. The caveat to this speed rating is that the developer must be freshly mixed (Ilford Universal paper developer diluted 1+15) and at 68f in temperature.
I develop the negatives to completion by inspection.
I know of another pinhole photographer who posts his work on F295 that uses this same paper and developer, but rates the paper at ISO6, then mixes the developer much more dilute, and includes a water bath between two such development steps in order to permit the shadow detail to come up without the highlights getting too dense.
One more note about metering a scene with paper. The sky will usually get blown out white, because of the predominance of UV and blue as compared to the landscape. So I therefore meter for the landscape or whatever principal subject matter, and let the sky blow out as it may. You see similar tonal effects in 19th century landscape imagery that used orthochromatic or actinic emulsions of similar sensitivity as paper, where the skies always look whited out, and skin tones are darker than normal (lack of red sensitivity in the emulsion). Portraits are thus possible with paper, but makeup is usually desired; plus, the blue sensitivity of the paper will reveal blotches under one's skin.
For exposing indoor scenes under artificial lighting, you can't trust your normal camera meter, which is sensitive to such light; but the paper is only sensitive to daylight wavelengths. Therefore tungsten or other incandescent lighting needs to be calibrated for your paper via testing, and exposure times are much longer than under daylight. But I've found that for daytime portraits, indirect daylight from a north-facing window gives good results.
~Joe


