Koolzakukumba
Real men use B+W
Hello again Brett,
Thanks to your excellent info, I took the top plate off the Vitessa and gave everything a good clean - apart from the rangefinder which I left well alone. I can now see through the viewfinder! I don't know yet if I'm going to keep the camera but it'll will certainly be better to use now that I can frame a pic.
I wrote about it here: http://www.theonlinedarkroom.com/2014/07/clean-bill-of-health-for-vitessa.html
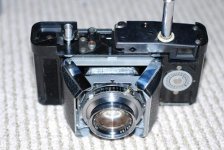
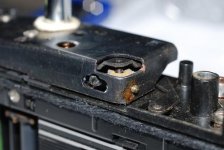
As I said in the post, the only thing I'm not too happy with is the feel of the focus wheel which is a little rough. I put a drop of light oil in the shaft in which the wheel rotates but maybe I should have used some grease? Here another couple of pics from the Vitessa for decoration. 🙂


Thanks to your excellent info, I took the top plate off the Vitessa and gave everything a good clean - apart from the rangefinder which I left well alone. I can now see through the viewfinder! I don't know yet if I'm going to keep the camera but it'll will certainly be better to use now that I can frame a pic.
I wrote about it here: http://www.theonlinedarkroom.com/2014/07/clean-bill-of-health-for-vitessa.html
As I said in the post, the only thing I'm not too happy with is the feel of the focus wheel which is a little rough. I put a drop of light oil in the shaft in which the wheel rotates but maybe I should have used some grease? Here another couple of pics from the Vitessa for decoration. 🙂