Y.A.S.C. (Yet Another Canonet Story)

Remove the top plate and do your best to thread other pieces of the 2mm x 1/32" fabric seal into all the 4 access points...as you see that I've done. You want the fabric seal to contact the body opening throughout the focus range. This isn't all we can do. Hang with me here...
 

Attachments

  • MVC-018F.JPG
    MVC-018F.JPG
    42 KB · Views: 0
  • MVC-019F.JPG
    MVC-019F.JPG
    83.2 KB · Views: 0
  • MVC-020F.JPG
    MVC-020F.JPG
    73.5 KB · Views: 0
After 20 or 30 minutes, your saliva will have dried, and the fabric pieces you worked into place will magically be attached to the lens body. These will provide some nice cushioning to help minimize the "wobble." But there could be more...your inner lens/shutter body piece may be loose compared to the outer piece. So, from the 2mm piece of fabric you've been using, cut 3 small (about 5mm or 6mm long) pieces, and remove the backing paper and...yes, lick them or put them into your mouth to get them wet. Then work them between the crack between inner and outer pieces as you see I've done. Slide them in to the point you don't see them, but not too far (take a look at the image in the previous post and look for the little piece hiding in the crack). You don't want them to disappear and fall in there. You'll see what I mean when you get started. Why only 3? Because if you put this fabric all the way around this opening, you'll stiffen the focus too much. And that is the name of that tune...

Good luck. This will reduce the wobble nicely. As for lubricating the helicals, sadly this isn't an easy thing to do, and it won't reduce the wobble very much (due to the design of this camera).

Jon
 

Attachments

  • MVC-021F.JPG
    MVC-021F.JPG
    32.7 KB · Views: 0
Jon Goodman said:
The Canonet lens/shutter "wobble" is always going to be present to some extent. There are no less than three reasons. Here is the first: The red arrow points to the area where the bottom of the lens is left with nothing to back it up. What would keep us from simply shimming a thick piece of cardstock between the two pieces? Nothing. But the cocking arm will not work correctly if we do this.
Yes.. Cardstock would be in the way of cocking arm left-right movement.

Jon Goodman said:
So, we can forget about that idea and concentrate on area of wobble number 2 (or dos as us bi-guys might say)...bi-lingual, that is.
Ouukeey! :)

Jon Goodman said:
Area 2 is that area between the body cutout and the ledge around the lens. .....Jon explaining procedure....
Minutes ago I disassembled whole camera again, preparing it for tomorrow's date with ohm-meter. Leatherette, front plates, front lens, central element, "three tiny screws" and the rest behind them all the way to film speed ring. This time I very closely observed leftover wobble location and it seems that it's only located in inner part of the lens whereas all barrel and focus wobble has been taken care of with four screws tightening procedure. Check the pic...

Jon Goodman said:
But there could be more...your inner lens/shutter body piece may be loose compared to the outer piece. ......Jon explaining another procedure in great detail.....
So, yes, that's where my wobble is. But I don't feel like your dampening procedure wouldn't do any good to it, since it's pretty small wobble, but is somewhat harsh, or how would I describe it - like there is one or couple of loose screws back inside that need tightening. One in the pic for example looks pretty loose (I don't want to touch it untill I'm certain that it needs to be tightened, as everything else...)

I'll sleep over it, go trough service manual carefully , maybe disassemble that PCB and other stuff that's in the way and see if there are some obvious screws that need tightening. Effect should be seen instantly.


Jon Goodman said:
Good luck.
Heh. I'm gonna need it with this pies of ****.Errr, I mean nice camera. I still believe that with patience and cool head I'll get this one to fully working state. How naive is that? :cool:


Jon Goodman said:
As for lubricating the helicals, sadly this isn't an easy thing to do, and it won't reduce the wobble very much (due to the design of this camera).
I thought, since I got this far, why not one step further. I consider myself warned.
Still, wobble is minor reason why I'd like to grease it up. Main reason is stiffness (especially stiff near the infinity end of the focus - most used part) so it makes it hard to use...

Jon, your effort and work is greatly appreciated! I don't feel alone in this one.
Thanks mate!!


Starlog, supplemental:
I wanted to shoot few Tri-X rolls and see how camera focuses, and how pics look like for this weekend. But as soon as I took the first roll to pop it in, shutter started exhibiting well known sticky slow-mo behavior. It looks like that after I opened the camera's guts (front plates behind leatherette) and cleaned inside with Q-tip and Zippo fluid that some of Zippo fumes started that old grease pouring back to shutter blades. So, beware, Canonet tinkerers, shutter blade cleaning should be last of the cleaning you're doing, at least to my experience.
Will start that dead-meter haystack hunt tomorrow, when I get my hands on the ohm-meter.
I'll post about the future progress (or that other thing). Maybe some day someone will learn something from this school has-it-all sample of Canonet.
 

Attachments

  • wobble.jpg
    wobble.jpg
    149.6 KB · Views: 0
  • front.jpg
    front.jpg
    155.6 KB · Views: 0
You'll soon hear the rest of YACS. But first, I have the need to write few things about how things are done inside the Canonet. I know how much trouble I had while trying to find this info, so here it is for you, future readers who got sample of Canonet bad enough that you want to try your surgical abilities with it.

For you pros out there, some of this is likely to be sacrilege, but you know how thing are done anyway so please don’t get offended. Keep in mind that I got the camera really cheap and in extremely bad condition, so in fact I had nothing to loose (but few sleepless nights).
Sorry if I misspelled or gave wrong name to something, but English is not exactly my mother tongue.


SURGEON GENERAL'S WARNING

This is the first camera I ever opened and read about how difficult it is to work with and now I can say nothing more that I fully agree. It’s complex and tricky. Once you open it you’ll feel like barefooted in minefield. So if something works – do not fix it. Be very patient, take careful notes and keep your digital P&S handy and take as many pics as you can, whenever you notice something that might look like it has to be put back in exact same place. Believe me. Sometimes even tenth of millimeter is important. Go one step further only when figure out how some parts correlate to each other. Never apply any force to put something together. If it won’t go easy something is wrong, recheck the pics, take a break, rethink it…
Etc, etc. You’ve probably got it by now. But don’t get scared. I had really good time doing it!
 
TOOLS

First you’ll need tools of course. Here is what comes to my mind and what I’ve been using for last ten days or so:
-Phillips head screwdriver (lightly magnetized preferably; be sure it’s small and sharp, you don’t want to leave scars all over)
-few differently sized flat screwdrivers (some of screws inside are plain headed; this are particularly nasty)
-long nose pliers
-tweezers (to handle wires)
-soldering iron
-multifunction voltmeter (for hunting broken wires and dead solders)
-scalpel
-knife
-scissors
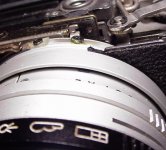
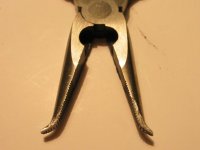
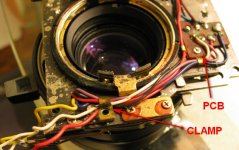
-Canonet-opener (this is how I call modified long nose pliers that with bent and filed tips; be sure to file it to exactly match the retaining rings’ notches, while being as flat as possible so it won’t slip from notches when you apply some force and that you file them in way that these wont scratch cylinder in which particular retaining ring is contained – that means their outer side; pic #1)
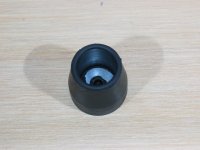
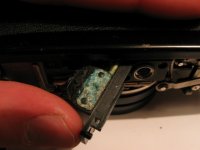
-rubber lens extractor (or whatever you might want to call it – it’s walker’s rubber tip with 25mm inner diameter; I got it very cheap from shop that sells orthopedic aids; pic#2)
-masking tape (to keep things in place)
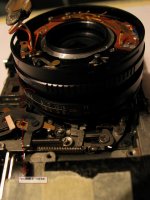
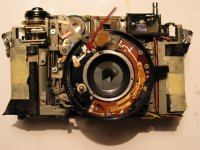
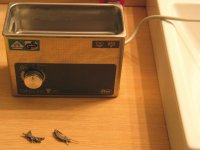
-ultrasonic bath (for cleaning shutter mechanism; you don’t need this one, of course, I just want to brag about it; got it from my dentist friend, hehe; pic#3)
-small post-it notes (I’ve found that it’s excellent way of tagging screws; put particular screws or whatever in upper sticky part of post-it, press it down so it wont escape and write down where it belongs)
-box of Kleenex
-box of Q-tips
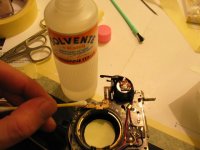
-lighter fluid (Ronsonol, Zippo; these should be practically the same, contain naphtha; to clean inside, outside; do not harm to plastic, metal, etc..)
-windows cleaning fluid (you call it Windex, I guess; for rangefinder system cleaning)
-nail polish remover (to free some of the screws)
-transparent nail polish (to secure ‘em back)
-white vinegar (to clean leaked battery residue)
-teflon or silicone grease (for focus helix lubrication, do not use white lithium grease as some suggest to be on the safe side)
-thin double sided adhesive foil (I’m not sure, but I think that one I got was made by 3M and cost around $4 for B1 piece, that’s 707x1000 mm – more that you’ll ever need; used for leatherette gluing; doesn’t have to be extra sticky, on contrary, I think that light stickiness is preferable, since it’s going to be easier to remove it again if needed)
-divider with blunted tips (for front silver filter retaining ring and central element extraction, I posted pic in one of previous posts)

Can’t think of anything else right now…


SERVICE MANUAL

Get complete manual here:
http://pentax-manuals.com/repairs.htm

Most important pages in much better quality:
http://www.kyphoto.com/classics/repairmanuals.html
 

Attachments

  • 02_1-canonet_opener.jpg
    02_1-canonet_opener.jpg
    38.5 KB · Views: 0
  • 02_2-rubber_lens_extractor.jpg
    02_2-rubber_lens_extractor.jpg
    117.9 KB · Views: 0
  • 02_3-ultrasonic_bath.jpg
    02_3-ultrasonic_bath.jpg
    111.4 KB · Views: 0
Now, let me give general disassembly info, which you’ll use depending where you want to get and what to repair (or brake, hehe)…


TOP AND BOTTOM REMOVAL

You’ll find info about this easy. Here is the best source, by Rick Oleson:
http://rick_oleson.tripod.com/index-30.html

But here it is in short…

Top
Remove three screws, grip advance lever’s top ring with masking tape, note rings’ position (the lowest is not where it should be in Rick’s sketch). Open door, put something (screwdriver?) in rewind fork to hold it in place and unscrew rewind knob. Lift top straight up. As soon as you do that you might want to secure meter’s needle from damage by putting small piece of tape over it and press it lightly to aperture scale, somewhere in the middle of the scale. I used Scotch magic tape for this – be sure it’s not too sticky so it will lift and bend needle when removing later on. If you’re about to go further it is good idea to remove film counter plate (the thing with numbers) ‘cause it’s pretty thin and could be easily bent (I saved my this way).

Bottom
Open back door, remove two screws. Note that these are with countersunk head. Now you know why I’ve said to write everything down on Post-its. Hold battery cover pressed down with screwdriver or something else and slowly lift the cover. There is a loose plate spring there that holds battery cover. Now you can slowly let screwdriver and get plate spring out. Bottom opened!
 
LEATHERETE AND FRONT PLATES REMOVAL

Although this sounds complex it’s not! As long as you’re doing it slowly and carefully lift sides by sharp pointed knife, you should be fine. Others say that Canonet leatherette is among the toughest around and that it’s most likely that it will go up in a piece. Mine did, I just had one small 1 mm crack in the middle part, nearest to the lens barrel, but it was not a problem, because when I glued it back later on with double sided adhesive foil it was not visible anymore.
Anyway, work your way from top and bottom slowly and gently pull up. Help yourself with a knife when it won’t go. If it’s stuck in some place, try to get to there from the other side. You’ll get it. After removed glue it to the sides with masking tape, so you it wont interfere with your work. You have to peel off some more on the right side because of focus knob.
Regarding name plate… Use sharp knife. Press the blade against short side and use blunt side as a lever. It should let go.

When you’re done with your inner work, you’ll want to glue it back on. It’s easy and it’s going to be better than original. Take that double sided thin adhesive foil, cut it to the pieces that you’ll need for left and right plate, name plate and don’t forget about metal part in the lower left (when looking from the front). Remove one protective side and glue those parts to it. It’s easy to cut around the shape using scalpel or X-Acto knife. When putting back right side, you’ll want to lick lower part of it, to delay it from sticking so you can slide lower right under the focus knob. Left is easy. Name plate annoying… After you glued left leatherette, cut out excess foil trough name plate leatherette hole and glue plate back on. Apply pressure to stick it firmly. Done! As good as new!

Both LH and RH front plates are held in place with two screws. Remove those, lift plates and enjoy your first view in Canonet guts! :)

I posted pics in previous thread so go up if you want to see how it looks like.
 
BATTERY COMPARTMENT REMOVAL

It’s held in place by two screws.. Blah, blah… - take a look in service manual. It’s pretty straightforward. Now you can clean it nicely with vinegar. You’ll see what I mean if as you go further on. Do not pull it out too much – you could slide blue wire that leads to inner PCB under inner rear hood, so it will be in the way of focusing movement. If you want to desolder it, remember that plastic is very sensitive to temperature, so use clean soldering iron and be quick.

If you choose to add Schottky diode for voltage regulation end of the metal (-) contact is The Place to do it. Be sure to trim it down so it won’t interfere with focusing. You’ll see..

Blue wire that I mention will probably have most damage if battery leaked. I had to replace it completely. Unfortunately, my corrosion problems haven’t stopped there.
 

Attachments

  • 05_1-battery_compartment.jpg
    05_1-battery_compartment.jpg
    86.5 KB · Views: 0
Last edited:
SHUTTER PLATE REMOVAL

Now you’re ready to go to The Heart of Canonet. But prior to lifting it off be sure that you took plenty of pics of exact wiring placement and noted how that finder mask works. After that, use Scotch magic tape to fix finder mask to rangefinder cover. Otherwise, it could fly over the room if you’re not careful. Now, when you are done do it all over again, I’m sure you missed something :) Use a light to peek inside too.

Focusing resistor wires (yellow and white) are little tricky, red one too. These have to be placed exactly where they are. You’ll figure it out.

Disconnect shutter linkage. Do this whit camera standing upright so you can catch brass washer. OK. Now desolder red wire that leads to inner PCB.

You can unscrew four screws in the pic now. Note that two of them (upper left and lower right) have countersunk heads! Position is important. Ah, yes, to get to lower right, you need to wind advance lever. It’s best to get this one first.

Only thing that now holds the shutter plate to the body is blue wire leading from battery compartment to inner PCB. Blue wire position is very important – it shouldn’t be in the way of focusing movement of inner rear hood. Be sure to peek inside while lifting shutter and lens assembly. Be careful not to catch rangefinder cover with hot shoe contacts when lifting. Finder mask should stay in place held by tape. Desolder blue wire on inner PCB.

Now, you’re in the business! The body probably works OK and if you have trouble it’s probably in your hand. Now you know how you can transplant good working mechanism! Or whatever else comes to your mind.
 

Attachments

  • 06_1-wiring_placement.jpg
    06_1-wiring_placement.jpg
    128 KB · Views: 0
  • 06_2-four_screws.jpg
    06_2-four_screws.jpg
    162.5 KB · Views: 0
That's it for now. I'm have to get some sleep. I don't even know if anyone reads this?? :rolleyes:

More to come. Especially if you're interested.
Oh, you should see the places where I've been to inside this camera! :D


Regards,
Drazen
 
FOCUS HELIX RELUBRICATION

Once you have lens/shutter assembly separated from the body, it’s much easier to approach various parts of the camera to inspect it and try to fix it. If you have stiff focus, relubricating it should help. It did help a lot in my case – from gritty focus with lots of resistance that was adding to lens wobble to silky smooth focusing.

Here is how to do it…

First, you will want to have some slack with the wires. Look at the pic. Unscrew clamp and PCB. It will add a lot of freedom to the wires and is much less likely that you’ll do any damage to them as you go further on. It seems like a good idea to cover rear lens with clean peace of paper too.

Remove the rectangular rear hood from the rear of the lens assembly by removing the two small screws. Lift the rear hood.

Now remove the left-hand (!) outer retaining ring (the one closest to you, when looking from above). I used bent and rasped needle nose pliers as a tool. For other ideas check here:
http://www.kyphoto.com/classics/canonetblade.html
Note that there is much easier to unscrew this retainer ring once the lens is separated from the body and inner rear hood removed, because you can now do full turn with whatever tool you’re using and you won’t be scratching inside of rear hood’s cylinder, too.

Remove top and bottom helix holders. Use nail polish remover to clean glue that holds the screws. Pic 2…

And now comes VERY sensitive part.
Slowly unscrew helix and when coming near the end go very, very slowly, and carefully try to lift it every mm or so. When you can detach inner part from cylinder, mark the EXACT position where the threads line up with scratches on both inner and outer part. Use file to make marks nice and visable, You want to be sure that you’ve aligned it correctly once you’re done. There are lots of different ways in which you can screw it back in, but only one gives proper focus! I counted threads and it looks like me that there is 14 of them. So, be really careful when you do this. If you miss it, you're doomed. Hehe

You can now thoroughly clean inner part of helix with soft brush and lighter fluid. Even maybe leave it to bath in it for a while to get all of the old grease out. Of course, you have to be much more careful with inner part, since it’s still connected to the rest of the lens. Mind the wires. Try not to put any strain to those or bend them much. Give it detailed cleaning too with soft brush and lighter fluid. Be careful not to let any of fluid to go where you don’t want it. And be patient, you won’t be doing this again any time soon. Allow to dry in the air to avoid lint form paper towels. To lubricate, use smallest possible amount of silicone or teflon grease (I’ve tried both – teflon is silkier, silicone better in dumping it; both very good, I believe). Apply with a finger and remove excess with a toothbrush.

Reassemble. Try your new focus.

Beside focus helix, my camera had another problem – some kind of dirt between outer part of focus helix and shutter plate. I was about to disassemble it too but was trying to clean it first. Nothing happened when I used lighter fluid, but only after cleaning was done with nail polish remover, ring started to move smoothly. But my camera was in really, really bad shape…


Oh, I almost forgot to mention… Beside other sources of wobbliness that you can fix (four screws on shutter plate, focus helix grease) you will see where the last source of wobble lies. It’s there between helix holders and inner part of the helix. Try to rotate focus and note that there is some (very little) slack when you go left and right. Nothing easy can be done with it. It will always be there and I guess that it can indicate how much particular camera was used – bigger gap, more back and forth movement of lens (focusing, that is)
 

Attachments

  • 07_1-loose_wires.jpg
    07_1-loose_wires.jpg
    138.6 KB · Views: 0
  • 07_2-helix_holder.jpg
    07_2-helix_holder.jpg
    49.4 KB · Views: 0
GETTING TO THE SHUTTER

Follow instructions in “Helix Relubrication” for rear inner hood and retaining ring removal.

After that you can carefully detach shutter plate from front part of lens, remove both rings you see (note exact position) and after that you’ll be very near the shutter. Only thing that’s in the way is shutter cover plate that is held in place with four screws. Three of those are secured by some kind of glue that is easily removed by nail polish remover and fourth holds spring connected to EE lever (you have to unscrew one on top of it too - be careful when removing it; start to unscrew it and when you’re half way done, push it in a bit and lift back up – it will allow you to remove the spring easy)
Oh, yes. I’m pretty certain that you have to unscrew rear lens too to lift the shutter cover plate.

Voila, you’re there. Now you can fix jammed self timer or take out slow speed governor for cleaning with ultrasonic bath. Or just leave it in lighter fluid bath for a while and clean with soft brush. This will clean any dirt and possibly fix too slow shutter speeds. I’ve marked screws (and retaining washer) you have to remove to get these two out with 1, 2 and 3.

Experienced people say that there is no need to put any oil in shutter mechanism, but that if it’s not working nice and fluid after cleaning, that it’s allowed (but only then) to put very small drop of very thin oil to the spindles of the star wheel and pallet. You’ll recognize star wheel easily when you see it. Pallet is little fork that rocks back and forth as star wheel turns.

Important notice… When you replace shutter speed cam back in place, just gently place it over the pin-outs and then go trough all of the shutter speed settings. This should collect all the pin outs, maybe not speed “click” spring – one that is connected to self timer mechanism and takes care that you can’t select shutter speed that is in between two settings. Regrease speed cam, you've probably cleaned it when took it out..

Also be carefull not to tamper with EE lever too much as you'll have to remove front parts of the lens to set it back in place, if you set it wrong way. I forgot one more thing, I think, so I'm adding it here. There is a clamp on shutter cover. You have to remove it too to get to the shutter, but it's obvious...
 

Attachments

  • 08_1-shutter cover.jpg
    08_1-shutter cover.jpg
    122.9 KB · Views: 0
  • 08_2-speed cam.jpg
    08_2-speed cam.jpg
    150.7 KB · Views: 0
  • 08_3-shutter mechanism.jpg
    08_3-shutter mechanism.jpg
    153.6 KB · Views: 0
Last edited:
I'll just wrap this up and tell you how I ended with my Canonet. I kinda lost interest to follow up to this thread since nobody is reading it. If in the future someone will, feel free to ask questions, I might know the answer.

If I take into account horrible state that camera was in, I can say that I'm quite pleased. I have camera with working meter with decent lens (few tiny scratches on front lens element). And I had good time tinkering on it. It was especially enjoyable because of email support that I got from Jon Goodman. He helped me a lot and in the end sent me a working sample without lens glass. I guess that he felt sorry for me when he saw awful rust and dirt in the pics I took inside the camera :)

But I done few mistakes and in these instructions I warned you about those. What I did wrong was that I moved shutter plate relative to rest of the lens once it was disassembled so I broke ASA speed setting ring connection wire and had to replace it. I am aware that I broke focus resistor wires too, but I don't care about those, since I'll not use flash. While closing shutter cover plate first time I didn't know that I had to go trough all shutter speed settings so that speed cam "catches" all the pinouts, so I bent one of the small levers on slow speed governor. It was real pain to bend it back again as it was. Spent few hours on it. You wouldn't believe how precise it has to be to work smoothly as it should. While cleaning bottom plate with naphtha I melted light and dust seal around film release button. I think that I caught light meter needle once and bent it slightly. This was not great problem, since it can be easily adjusted while looking at the meter and compare the resulted aperture. maybe few more, but that's it for now. Besides this, film transport mechanism sometimes kinda skips a little resulting in rare slightly overlapping shots. Sometimes I can advance film more times in a row. I didn't bend that advance lock lever enough I guess. Winding has some more resistance at the beginning of the stroke than it should have. Oh, yes. When shutter re-sticking situation played with my nerves I lost it and poured some naphtha all over the shutter and aperture mechanism before disassembling it first. It was baaaad idea. Grease from speed cam melted and went in all the places that you don't want to have it. That's why I used ultrasonic bath in the end on shutter mechanism pieces.

Now I have the knowledge about this camera that will last. And I'll probably use the silver good working one that Jon sent me and exchange parts to make it all black. This time I'll be extra careful and will know about traps that this little bugger has set for us.


Take care
 
Hello! I have some problems with my newly purchased (12$) Canonet 28. Perhaps you can help. The camera looks great, it's almost brand new. However, there are some issues and I'm not quite sure how to handle them.

The focusing ring gets stuck sometimes and I can hear something inside the lens which sounds like a rock in a can when I shake the camera. I think it's something broken in there, although focusing works. I can hear the same thing inside the camera body but I can check it out for myself because it looks easy enough to get the top off. I want to solve the focus ring problem as well but I'm not sure I can do it. It looks too difficult tu get to the lens from the inside. What would be the best way to reach the ring?

Another problem is to find an equivalent battery but I can manage that. I also can't get the back tightly closed. I'm hoping to get that fixed by myself.

Hope you can help...

I'm not sure if they look the same from the inside. My advice for you would be to read trough KYPhoto archives and search for Canonet 28. You'll find that forum to be excellent source of informations regarding camera repair. One other good source might be this one:
http://tech.groups.yahoo.com/group/camera-fix/

You can use my notes as general rules of precautions with your camera and probably some of it will be very similar to yours.

To remedy the problems you describe you'll have to disassemble the camera and then you'll probably figure out what's wrong by yourself. I can't tell you more than that. Possibly some part came loose and is moving inside the body. When cleaning inside of camera, be careful not to apply lighter fluid to focus helicoid. Otherwise, you'll see what stuck really means. Maybe focus helicoid relubrication is what your camera needs? I believe I described it somewhere in the thread...

In the end, honestly, if you don't want to spend week or so in fiddling around it, paying someone to do it for you could be better choice. Believe me, it's not easy if you do it first time, especially if you want to rip it all apart. I chose to do it because mine Canonet really looked very messy inside and I had nothing to loose...

Good luck with it!


Regards,
Drazen
 
Thank you for your advice. I'm going to do some more research today and tomorrow I'm going to open it up and see what's going on in there. For cleaning I'll be using isopropyl alcohol (99,6%). Perhaps I'll get back with some pictures in case someone else might be interested.

Even though you thought you wrote this tutorial for nothing, I found it pretty usefull and I'm sure others will as well. Take care!
 
Thank you for your advice. I'm going to do some more research today and tomorrow I'm going to open it up and see what's going on in there. For cleaning I'll be using isopropyl alcohol (99,6%). Perhaps I'll get back with some pictures in case someone else might be interested.
Be very careful with the lens. You don't want to ruin it! Keep glass protected at all times. Maybe you should get Ronsonol or Zippo lighter fluid for cleaning. These are the best solvents for cleaning as advised by many experienced camera tinkerers. Again, be careful not to let it or it's fumes to come in touch with focus lubricant. When removing retainer rings try to be extra careful and do it with firm, steady grip so your tool won't slip from notches and leave marks. Remember to take A LOT of pics and notes of everything for future reference. That's osme of first advices that come to my mind...

Even though you thought you wrote this tutorial for nothing, I found it pretty usefull and I'm sure others will as well. Take care!
Thanks for nice feedback. I'm glad finally someone has some use of it.

Regards,
Drazen
 
OK, all done! Actually, there wasn't much work to do :)) I opened the top and, as I expected, there was a tiny screw that had come off, causing all the noise inside. It connected a spring (attached to the film rewind knob) to the back lid locking mechanism. I put it all together and now the lid closes tightly. I was impressed with how the inside looked very clean with almost no sign of weathering.

I decided not to go inside the lens since this is almost a brand new camera and I was afraid I could broke it.

I bought an AG13 1,5V battery yesterday and replaced the 1,35V old mercury one. The exposure works fine, and by that I mean that the exposure needle moves. From what I understand, using a 1,5V battery means that I have to set the ASA value to half the film speed. 200 ISO film speed = 100 ASA on camera, I think.

All I have to do now is to replace the light seals and it's ready to shoot. Can't wait!

Take care!
 
OK, all done! Actually, there wasn't much work to do :)) I opened the top and, as I expected, there was a tiny screw that had come off, causing all the noise inside. It connected a spring (attached to the film rewind knob) to the back lid locking mechanism. I put it all together and now the lid closes tightly. I was impressed with how the inside looked very clean with almost no sign of weathering.
Great. I'm glad you made it. And what about focusing?

I decided not to go inside the lens since this is almost a brand new camera and I was afraid I could broke it.
You're lucky you found it in like new condition. Better not to go inside. If it ain't broke, don't fix it.

I bought an AG13 1,5V battery yesterday and replaced the 1,35V old mercury one. The exposure works fine, and by that I mean that the exposure needle moves. From what I understand, using a 1,5V battery means that I have to set the ASA value to half the film speed. 200 ISO film speed = 100 ASA on camera, I think.
No, you understand wrong. The problem with higher voltage won't be linear throughout EV levels, meaning that in low light conditions meter with 1.5V battery inside will show good exposure (if set properly for 1.35V), but in higher EV levels it will cause overexposure (even 2-3 stops). This circuit is very simple: battery - resistor (cds cell) - galvanometer (light meter with needle). There is probably variable resistor added next to light meter for linearity adjustment too. When light levels go up, CDS cell lowers it's resistance and causes voltage difference in battery source to have higher impact on meter reading. That's how I look at it. So, no Alkaline, no silver-oxide..
Anyway, see for yourself. Go out and point camera to area that will show 1/125s and f/4 with 100 ASA film speed. When you adjust shutter speed to 1/15s it should read f/11 and with 1/500s it should read f/2. With alkaline inside, it won't happen.
If you want to read further on this matter, here is very good source:
http://www.buhla.de/Foto/batt-adapt-US.pdf

What you need to do is get 675 hearing aid battery and adapter to place it inside PX625 compartment.
After you do that, you can check if variable resistor needs adjustment. This is the best solution, if accuracy is priority, which I believe should be.

All I have to do now is to replace the light seals and it's ready to shoot. Can't wait!
I highly recommend to get re-sealkit from Jon Goodman. He makes an adapter too. You've seen his replies in this thread... His re-seal kit is excellent and he's really very nice person to deal with. You'll find him under 'interslice' on eBay. I think he does not have battery adapter listed on eBay, you'll have to contact him for that one separately.

Good luck!


Regards,
Drazen
 
Focusing seems to be fine, the ring doesn't get stuck any more but now I can't set the film speed to 25. It's not such a big problem since I will probably never use 25 ISO film.

About the battery, I'm not much of a tech guy, I don't fully understand how the meter works and I've heard all kinds of versions on how to work with higher voltage cell. I'm just going to compare Canonet's metering with my other camera's metering and make the propper adjustments.

I'll consider buying Jon Goodman's kit but for now I'm just going to look for something in local stores.

Take care!
 
Back
Top Bottom