tomisimpern
Member
Hi all,
I have a 35 CC off the bay for spares/repair, and I'd prefer the latter (!).
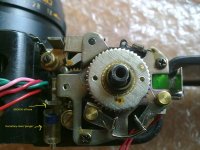
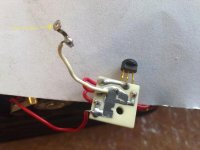
From looking around inside, the battery check plunger appears to have broken off its connection post (bad description, sorry), and the white wire is free at one end. It's still soldered to the batt check board ok. It looks to me that the white wire has a tiny terminal with a hole in (1mm ?) and I think it may actually fit in where the plunger has snapped off.
Has anyone seen a CC this close up (has one opened ?) and can guide me on where this wire should locate ? I'm happy to resolder whereever possible, and i may be able to Araldite the plunger back on its post.
I can post macro pix if anyone needs a better idea.
Thanks for any guidance,
Tony Simper
I have a 35 CC off the bay for spares/repair, and I'd prefer the latter (!).
From looking around inside, the battery check plunger appears to have broken off its connection post (bad description, sorry), and the white wire is free at one end. It's still soldered to the batt check board ok. It looks to me that the white wire has a tiny terminal with a hole in (1mm ?) and I think it may actually fit in where the plunger has snapped off.
Has anyone seen a CC this close up (has one opened ?) and can guide me on where this wire should locate ? I'm happy to resolder whereever possible, and i may be able to Araldite the plunger back on its post.
I can post macro pix if anyone needs a better idea.
Thanks for any guidance,
Tony Simper