Camera-Scan Challenge for Color-Neg, as Automatic as Possible

You worked from a screenshot of my negative? Surprising that it turned out at all.

My ColorPerfect is a Photoshop filter. It has four options: TouchUp, ColorNeg, ColorPos, and PerfectRAW. I've only used ColorNeg.

So RAW -> MakeTiff -> Photoshop -> Filter... CF Systems... ColorPerfect... ColorNeg.

Wow, when I make a MakeTiff TIF file I can hardly see anything it is almost black. Then when I hit PerfectRAW it comes out so I don't even have to hit the white balance feature. The reason I didn't use your RAW file was it didn't open in PSE.

I'll have to try a MakeTiff TIFF file in ColorNeg??????
 
Wow, when I make a MakeTiff TIF file I can hardly see anything it is almost black. Then when I hit PerfectRAW it comes out so I don't even have to hit the white balance feature. The reason I didn't use your RAW file was it didn't open in PSE.

I'll have to try a MakeTiff TIFF file in ColorNeg??????

Feed my RAW to MakeTiff, and work from there.

The linear tiff file opens fine in Photoshop; it looks stupidly dark. ColorPerfect knows how to fix it.

MakeTiff -> ColorNeg is the recommended process by CF Systems, and MakeTiff -> ColorPos for positive images.
 
Feed my RAW to MakeTiff, and work from there.

The linear tiff file opens fine in Photoshop; it looks stupidly dark. ColorPerfect knows how to fix it.

MakeTiff -> ColorNeg is the recommended process by CF Systems, and MakeTiff -> ColorPos for positive images.

I'll try it, I just tried a MakeTiff TIFF file from a Digital camera and opened it in ColorNeg and it was, well, negative then I hit Filter, Adjustment, and invert; not good.

I would like to know what you did to get an image.

If I had my way with the world. I would convert my RAW file of a C-41 negative to just regular TIFF and then open it in ColorPerfect using ColorPos.

And that is what I did with your copied jpeg. But I'd rather have a TIFF, and I don't really know how to do that.
 
I'll try it, I just tried a MakeTiff TIFF file from a Digital camera and opened it in ColorNeg and it was, well, negative then I hit Filter, Adjustment, and invert; not good.

And that is what I did with your copied jpeg. But I'd rather have a TIFF, and I don't really know how to do that.

Digital camera (positive) -> MakeTiff (still positive, but dark) -> ColorNeg

... That will invert the file and make it negative.

Try this:
- Get my raw file for the test box (a negative image)
- MakeTiff (resulting tiff will still be negative, very dark)
- Then ColorNeg (inverts and fixes everything)
 
It didn't really work for me, but I'll try again. I suppose that if I made a C-41 digital image with my DSLR in RAW and then saved it in PS as a TIFF file. After saving and then went to ColorPerfect and used ColorNeg. I would get what I did with your jpeg copy and I would have very little messing around in post?? Thanks, I don't really like work around(s) but at least mine is simple.

Isn't a RAW file already a linear file? I don't know because I work mostly is film. But when I want something really tight I do use my DSLR set up of 35mm 'scanning.'

Untitled by John Carter, on Flickr
 
I suppose that if I made a C-41 digital image with my DSLR in RAW and then saved it in PS as a TIFF file. After saving and then went to ColorPerfect and used ColorNeg. I would get what I did with your jpeg copy and I would have very little messing around in post?? Thanks, I don't really like work around(s) but at least mine is simple.

Isn't a RAW file already a linear file? I don't know because I work mostly is film. But when I want something really tight I do use my DSLR set up of 35mm 'scanning.'

John --

Put a negative in your DSLR copy rig. Shoot it in RAW.

RAW file -> MakeTiff -> ColorPerfect (ColorNeg)

Much better color tonality than doing the RAW conversion in any other program and then processing in ColorPerfect.

Yes, the RAW file is linear data. But, if you do the RAW conversion in Photoshop or any other program, it's no longer linear. You've seen this: The output of MakeTiff doesn't look like the output of an Adobe CameraRaw conversion.
 
John --

RAW file -> MakeTiff -> ColorPerfect (ColorNeg)


Yes, the RAW file is linear data. But, if you do the RAW conversion in Photoshop or any other program, it's no longer linear.

Right, I hadn't thought of that. Still, don't you have to use PerfectRAW before you put the PerfectRAW file into ColorNeg?

When I put any MakeTIFF file into color negative it doesn't come at all. But I haven't had a C-41 RAW file to work with.

I may try one tomorrow.
 
Jack, can you explain the Channel Mixer presets you have shared. There are 200 items, ranging from -100 to +100. It appears to me that these are presets to add/remove different degrees of saturation. Like PS or LR's saturation adjustment, but with slightly different effect.

Are these general, that is, a better way to add/remove saturation for all images?

Or, are these specific to film? That is, purpose-built for adjusting saturation in film scans?

Also, FWIW, I can match your result for the "steps" image, and it's very good, but only with a linear tiff produced by dcraw.

- Make a linear tiff with dcraw -v -w -H 0 -o 0 -q 3 -4 -T fileName
- Open in Photoshop
- Curves... use your c-log-rev-inv.amp file (result looks awful, bluish haze)
- Channel Mixer with preset AIMRGBpro +100.cha (more sat, but still awful)
- Make an "Auto" adjustment (result looks very good)

When I do the same with a linear tiff from MakeTiff, highlights are blown and color-cast.

Right - saturation adjust via channel mixer produce slightly better result (better tone separation, less clipping, darker colors) - you can try do it before log curve to see if it taste better - saturation vectors were calculated for AIMRGBpro space that is wide gamut and gamma 1. Adding saturation is a must because image in wide gamut will look desaturated on sRGB screen.

If Autolevels does not find white/black point properly then do it manually for each channel moving sliders up to tails then use R or B gamma middle sliders to correct midtones for some films/light conditions. Results from MakeTIFF and DCraw should be similar despite color cast you see when you open image.

All things we discussed here is old topic from over 17 years ago when decent scanners appeard on market for masses. Photoshop 6 era.
 

@meloV8, those are good. Fully automatic? That's about what I'm getting out of MakeTiff -> ColorPerfect.

FWIW, I'm finding that I want to add saturation to what's coming out of the "Auto" settings when doing camera-scan of color-neg material.
 
Straight out of homebrew script (no PS was used except for applying AdobeRGB profile and then converting to sRGB for proper web display):


Minor tweaks about colour balance from case to case still needed, we will try to come up with a way to do that automagically...
 
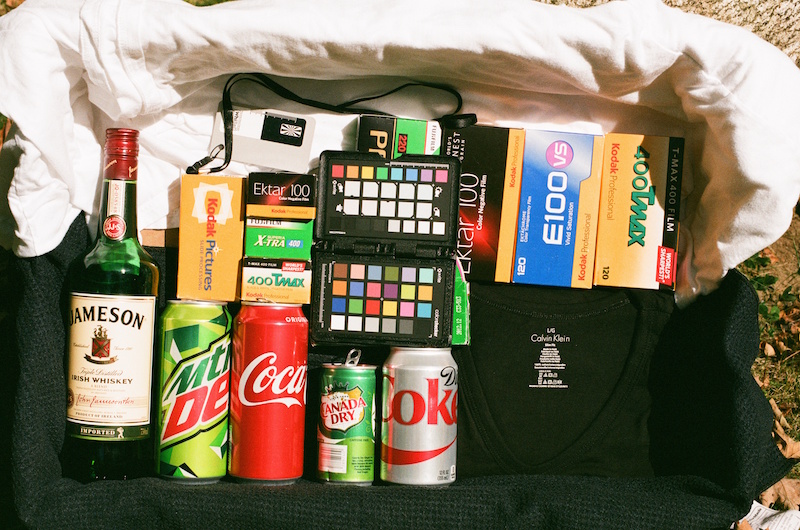
Friends, just to show that our camera-scans are doing pretty well, here's the Mini-Lab scan of the test box Fuji200 film. My aim in all this has been to get almost-automatic scans as good as the mini-lab I used to use, files that would be suitable for further touch-up. I think the examples here show we can do this with camera-scans.

171004-TestBox-Fuji200-MiniLabScan-Fr8-Scr.JPG


And, with this, I suggest we wind down this thread. Thank you all for your participation and tips. I've learned a lot in this process.

Go ahead and post further replies if you wish, but I'm going to wind down.
 
p.s. I promised a good film camera to the contributor who helped me the most.

A good Yashica SLR with 28mm lens is on it's way to Jack Zagaja in Poland. And, big thanks to all who contributed.
 
Very little difference between DCraw and MakeTIFF.

dcraw gives the same output as MakeTiff with added "-r 1 1 1 1" parameter:

dcraw -v -H 0 -r 1 1 1 0 -q 3 -4 -T -o 0 filename.raw


Then the camera recorded WB is not used for output nor is computed during dcraw processing. Should not make much of a difference for single image, but might give more consistency for automated batch inversions...
 
Hi,

First post on the forum, but this thread was so interesting that I had to join to reply.

I use an imagemagick.org script called "negfix8" for my negative processing: https://sites.google.com/site/negfix/

It works very good, but is very sensitive to extreme light and dark elements in the scanned frame, such as negative carrier shadow, large dust particles or sprocket holes (or clipped channels in general). I've tweaked the script a bit to fit my own scanning habits and inserted it into a batch scrip with dcraw raw conversion. This way, I can process entire folders of raw files without user intervention.

I find the results quite good and the are usually easy to edit into pleasing colours. The test images of this thread turned out like this, processed as batch, however I've had to adjust white balance of the raw conversion separately.

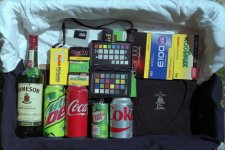
First test image:
https://www.dropbox.com/s/uvh6nmsoaqi2yqp/171004-TestBox-Fuji200-SonyNoFilter-DSC9558_o0.jpg?dl=0


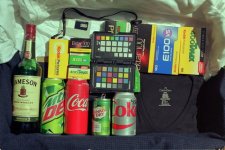
The Ektar scene:
https://www.dropbox.com/s/cguzb1galkguv25/171004-TestBox-Ektar100-NoFilter-DSC9554_o0.jpg?dl=0

The rest:
https://www.dropbox.com/s/f87d1lqaoq8kz8p/mws_0017.jpg?dl=0

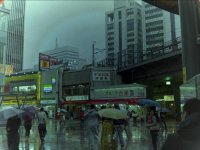
https://www.dropbox.com/s/qkcf5jh7n6sf6rm/101026-Tokyo-Fr6_cs.jpg?dl=0

https://www.dropbox.com/s/xjoe5bqemoq645c/100918-Fr19-3000k-NoFilter-DSC0004_o0.jpg?dl=0

brbo: would you care to share your script?

Thank you all far a very informative thread..
 

Attachments

  • 171004-TestBox-Fuji200-SonyNoFilter-DSC9558_o0.jpg
    171004-TestBox-Fuji200-SonyNoFilter-DSC9558_o0.jpg
    36.1 KB · Views: 0
  • 171004-TestBox-Ektar100-NoFilter-DSC9554_o0.jpg
    171004-TestBox-Ektar100-NoFilter-DSC9554_o0.jpg
    38.1 KB · Views: 0
  • 101026-Tokyo-Fr6_cs.jpg
    101026-Tokyo-Fr6_cs.jpg
    32.2 KB · Views: 0
Last edited:
Back
Top Bottom