Daimon
Established
Does anyone have photos/tips for Canon 50mm f1.5 disassembly? Couldn't find anything and I have a really nice copy so don't want to mess something up there.
Aim is regreasing of both focusing helicoids and aperture ring. Lense looks to have already been cleaned but focusing sounds a bit dry
shawn
Veteran
It is pretty straight forward. There is an outer retaining ring at the back of the lens. If you take that out the lens will basically split in two to the optical unit and the focusing unit. Look on youtube for cleaning instructions for the Canon 50mm f1.2 lens, the f1.5 is similar.
xayraa33
rangefinder user and fancier
I cleaned one from lube haze, like Shawn said, unscrew the outer retaining ring and unscrew the rear lens block to get at the haze in my case...you might have different problems on other lens elements.. so YMMV.
lukx
Well-known
I have disassembled this lens multiple times, so maybe I can give some tips. I don't know your experience level so let me say this: You need a good lens spanner to work on this lens, a good set of small screw drivers and proper helicoid lube of different strengths.
The optical block separates from the helicoid via the slotted retaining ring which you see around the rear element. Only remove this very carefully and with said spanner, otherwise you risk damaging the rear element.
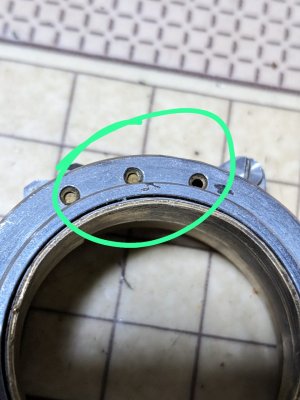
Once separated, there are many screws to remove: The screws on the mount side of the lens let you release the guide pin/helicoid key that regulates the movement of the helicoid between infinity and 1m. But there are additional stopping pins accessible from the front of the helicoid, which let you fine-tune infinity and 1m (see photo below). When you assemble the helicoid again, you need to calibrate the front guide pins so that the lens reaches infinity again.
After removing the screws at the front, you can take the chrome focus ring off in order to access the bare helicoid. There is another retaining ring on the front side which holds everything together. Again, use the spanner to remove it.

The lens has an interesting construction, it is a single helicoid, not a double helicoid. This makes it a little easier to find the correct setup of the helicoid when putting it back together. But make sure you document where the helicoid separates. You'll know when you put it together wrong because you won't be able to fit the helicoid key back into its slot when the helicoid is off.
The photo below shows the holes of the screws that hold the main helicoid key in place. The pin rubs against the inside of the helicoid tube, so for smooth focusing you have to lubricate the lower part of the inside of the helicoid tube, and underneath the front retaining ring. Use small amounts of medium thickness lube. The helicoid itself can take a lighter lube.

The aperture ring has even more screws which all have to be removed as well. Do not lose the small ball bearing held in place by the brass clip (the bearing sets the click stops of the aperture). Also keep track of the screws. When everything is removed, there is a thin brass ring which sits halfway tucked into the optical block. You need to remove it carefully, not bending it too much. After that the aperture ring should come off. I recommend not taking apart the aperture any further (i.e., don't remove the aperture blades). If the blades are greasy, remove all the optics (VERY carefully, of course!) and flood clean with lighter fluid. I am not sure if the aperture requires much grease, maybe grease the surface on which the little ball bearing moves and clicks into place...

Daimon
Established
Wow thx for detailed info.
I'd say I have all the tools (and already did some interesting things like full lens disassembly including aperture blades or beam splitter replacement on rangefinder) but lack experience with those Canon lenses - and my copy looks so good that I don't want to mess something up
instructions are very helpful.
Will follow up once I tried to disassemble it (based on your feedback need to reserve bit more time )
I'd say I have all the tools (and already did some interesting things like full lens disassembly including aperture blades or beam splitter replacement on rangefinder) but lack experience with those Canon lenses - and my copy looks so good that I don't want to mess something up
Will follow up once I tried to disassemble it (based on your feedback need to reserve bit more time )
Daimon
Established
@lukx aperture ring first - disassembled and reassembled without any problems. Removed previous grease (or rather what was left of it), applied new, light one. It made ring lighter to turn (it was very, very stiff before) but it's still quite stiff compared to my other lenses. Maybe I'll need to flush aperture blades as you mentioned. Clicks are also barely noticable between f1.5 and F2.8. F5.6-F16 are much more noticable - probably just wear of surface where ball rides


lukx
Well-known
You can try re-adjusting the brass spring that holds the click stop ball bearing to apply a little more tension, or even bend it a little. But I agree, the smoothness of the aperture ring is difficult to get right on these lenses.
Daimon
Established
Already did that - applied downward tension to both sides of spring when screwing it to body. It improved a lot compared to first attempt (with first try I got no clicks at all
) but still clicks are weak compared to overall ring tension.
After cleanup and regressing but before full reassembly ring was very smooth itself so it's either that brass retaining ring which applies too much pressure (ring also got very thin film of grease) or overall tightness of fit with all elements assembled.
Anyway much better compared to what it was before
aw614
Established
Bumping this up as the information on getting the aperture smooth look will be useful for the hazy 50mm 1.5 (and Canon IV S ) I just got today off marketplace when I get a chance to work on it.
How does the rear element come out on the 1.5? I've taken apart multiple Chrome 1.8 50mm Canons and the black and chrome 35mm F2.8 lenses and those were all really similar to each other, but the 50mm F1.5, I can't seem to get the rear elements out to clean.
Does the black section in the rear unscrew out? If so I can't get it off with my lens rubber tool and it is really hard. Only the parts that have the slots for a spanner wrench came off and with the lens rubber tool only spins the rear element and it does not come out.
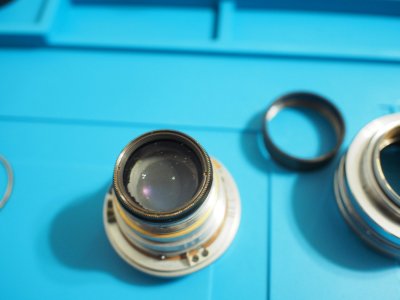
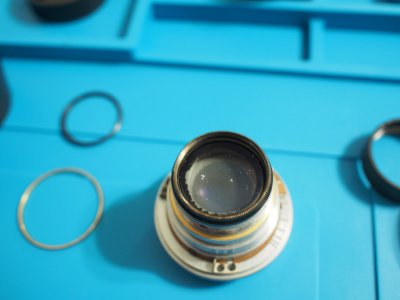
The front filter is bent...and for the most part I've usually gone in from the rear when I've taken apart my Canon LTM lenses. But if I have to go from the front, I might just have my local camera shop take a look at it as they've fixed bent filter rings.
Attachments
TenEleven
Well-known
For bent and stuck on filters I have had good success with a ring wench. Then I usually disassemble the lens to get the optics out of the way and use a piece of very soft wood (disposable chopsticks are good) as a sort of dowel to try and tap it back into shape.
I know there are dedicated tools for this but I have had decent success with this method. With this method, it will never be as smooth as it was, but I gotten all of them to a state where they accept a screw in hood again.
aw614
Established
Sort of an update, aperture ring is better, but will need to continue to work on it as it is still rough.
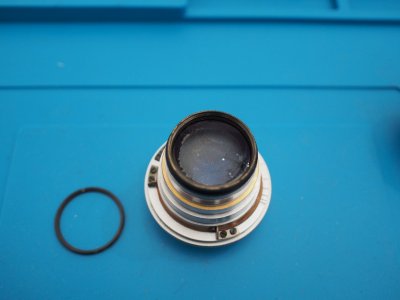
I feel like an idiot and didn't realize there was another retaining ring which I was able to unscrew, but the rear lens element doesn't seem to want to come out. It comes down a bit but gets caught and doesn't completely fall off. Is there any way to get it off? I was trying to get it off by lightly tapping on the lens, on my rubber work pad over a table.
TenEleven
Well-known
Have you unscrewed the retainer for the glass? Aka the inner retaining ring?
Actually there is usually no need for that as the entire assembly, meaning the rear group plus the brass casing holding it should all come out in one piece. For me these were never more than finger tight and I could always just unscrew them with the lens disassembled. Do you have a rubber stopper or something that you could use to apply a strong grip to the rear retainer without crushing or gouging it?
TenEleven
Well-known
aw614
Established
Have you unscrewed the retainer for the glass? Aka the inner retaining ring?
Actually there is usually no need for that as the entire assembly, meaning the rear group plus the brass casing holding it should all come out in one piece. For me these were never more than finger tight and I could always just unscrew them with the lens disassembled. Do you have a rubber stopper or something that you could use to apply a strong grip to the rear retainer without crushing or gouging it?
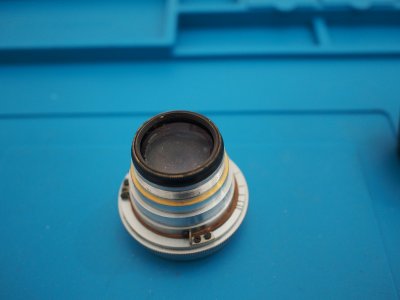
Just went and grabbed a quick picture of a junker I have on hand. There is no retaining screw or spanner slot anything, just a ridge for you to get a good grip with your fingers. It should just come out, like so:
View attachment 4833534
I was able to use the rubber lens tool to remove the ring as shown in the photos, but the rear lens element won't come out is what I meant. It seems to want to come out, but something seems to be stopping it, as it moves like 2-3 threads and it just doesn't fall out any further.
The picture you took helps, I guess mine seems really stiff, I think I need a latex glove or a rubber glass bottle openner or something to assist with, it is not budging for me.
Attachments
TenEleven
Well-known
Hope you can get it off. And I also hope the haze that I see on yours is cleanable. In my junker it sadly was not - whatever was off gassing from the aperture or the lubricant therein destroyed the coating of the surface facing it. That's not always the case, I had some come out spotless despite me expecting not be able to clean it, so don't give up yet!
Daimon
Established
I personally use ESD gloves with rubberized anti-slip finishing. It allows to apply lots of torque directly using hands and you get proper feel of what you are doingThe picture you took helps, I guess mine seems really stiff, I think I need a latex glove or a rubber glass bottle openner or something to assist with, it is not budging for me.

For very, very problematic cases I had success using rubber car filter wrenches but this is last resort and so far only had to use it on some old USSR lenses

For tough retaining rings you need proper spanner, the ones with longer perpendicular arm allow to apply more torque with less risk of slipping

Last edited:
Fakhruddin Usmani
Newbie
Hey can you help me.. I am stuck with Helicoid, I cant get it our, it seem the brass T shape lock for the infinity and close focus is hindering the rotation. Is there a way to remove T shape Brass stopper, though I had removed three tiny screws from the mount side.. you can also reply if youo like on my mail address @usmanifakhruddin@yahoo.com
rews from the mount side...

Attachments
SPBaldwin
Newbie
Picked up a copy of this lens that has some hazing on the inside of the rear element (looks like fungus ate the coating) that I can live with, and with a aperture ring that is very stiff but movable, but does not move the blades at all. I can remove the rear element and get to the back side of the blades, but can't see for yet any pin/shaft that connects the ring down into the body to move the blades. I'd appreciate any advice here on what to look for once I get deeper into the lens!The aperture ring has even more screws which all have to be removed as well. Do not lose the small ball bearing held in place by the brass clip (the bearing sets the click stops of the aperture). Also keep track of the screws. When everything is removed, there is a thin brass ring which sits halfway tucked into the optical block. You need to remove it carefully, not bending it too much. After that the aperture ring should come off. I recommend not taking apart the aperture any further (i.e., don't remove the aperture blades). If the blades are greasy, remove all the optics (VERY carefully, of course!) and flood clean with lighter fluid. I am not sure if the aperture requires much grease, maybe grease the surface on which the little ball bearing moves and clicks into place...
lukx
Well-known
You‘ll have to post some photos of where you are in the disassembly. It sounds like you are trying to reach the aperture mechanism from the back of the lens, but that is incorrect. Have you separated the lens block from the helicoid yet? That is the first thing you need to do. Post some photos of your current progress and I‘m sure people can help.Picked up a copy of this lens that has some hazing on the inside of the rear element (looks like fungus ate the coating) that I can live with, and with a aperture ring that is very stiff but movable, but does not move the blades at all. I can remove the rear element and get to the back side of the blades, but can't see for yet any pin/shaft that connects the ring down into the body to move the blades. I'd appreciate any advice here on what to look for once I get deeper into the lens!
SPBaldwin
Newbie
Thanks for the tips! I was able to get the aperture ring off tonight and have discovered that somebody else has been in here and removed/lost the grub screws that hold the aperture blade assembly in place, and allow the aperture ring to open and close the blades.You‘ll have to post some photos of where you are in the disassembly. It sounds like you are trying to reach the aperture mechanism from the back of the lens, but that is incorrect. Have you separated the lens block from the helicoid yet? That is the first thing you need to do. Post some photos of your current progress and I‘m sure people can help.
I was able to use some grub screws from a donor lens to get the aperture ring working, but they are a bit too long for the assembly to go back together again. I’m gonna keep hunting through my donors and see what I can scare up.
Share:
-
This site uses cookies to help personalise content, tailor your experience and to keep you logged in if you register.
By continuing to use this site, you are consenting to our use of cookies.