Darkroom Renovation Phase 1

The "Glycin glow" is pretty amazing. I hope it come through in my graded Aristo RC prints.

Also regarding Lomida contact printing paper, I'm thinking the LED would work for burning the Uber slow paper. Could take minutes to expose but who cares? Enlarge Contact prints. LOL

Only downside is the cost. $125 for 25 sheets of 8x10 :(

Thinking back through the fog, I used to enlarge with Azo and Velox papers. Before I had an enlarger. Used a slide projector to expose Velox. Later on I discovered Azo.
 
Omega E6 Omegalite by Nokton48, on Flickr

I'm looking for a clean Omega 5x7" E6 Enlarger, and the Omegalite E6 head. I really don't need the baseboard, but I need the base. Something that looks like this one.....................
Let me know if you have anything
-Dan
 
Omega E6 Cones 2 by Nokton48, on Flickr

These are cones for the Omega 5x7 E Series Enlargers. The cool thing about staying with Omega, is that all the DII 4x5 cones I have modified, can be fit on the bigger E enlargers. Some other accessories are interchangeable, too.

I have a deal in the works for an E3 or E5 (autofocus) 5x7 Omega enlarger plus a bunch of accessories. :)

I will build a short 2x4 wood table to support this enlarger's baseboard. If I can print 5x7 negs up to 16x20 I will be a very happy camper :)
 
New Omega E3 5x7 Autofocus Enlarger by Nokton48, on Flickr

My new Omega 5x7 E3 Autofocus Enlarger arrived yesterday in three heavy boxes. These are the main pieces in my garage.

IT'S a BEAST.

It looks pretty good for being 70 years old! Having restored three 4x5 DII's I am ready for this. I am building a baseboard by gluing two pieces of 3/4" MTF. Lots of dirt and corrosion but I know how to deal with that. I will build a short 2x4 table to make a little bigger than 16x20s.

I also got a 4x5 condenser DII head with E3 Adapter, a homemade LED 5x7 E3 head (VERY COOL!), three E3 negative carriers, 5x7, 4x5 and 3x4. And two E3 lens cones and three E3 lenses. The two lens goodies are: The 190mm Wollensak, and the 135mm Wollensak. The enlarger came with both of those cams, the 190mm is serial number matched to the focusing cam on the enlarger column.

So, away I go into 5x7! :) I also do 8x10 but those are contact printed.
 
E3 Baseboard Bottom Side Finished by Nokton48, on Flickr

Here the E3 Baseboard is finished. This is the bottom side, I was going to also use wood glue, but really I don't think it's going to come apart. Has over a hundred countersunk 1.25" construction screws holding it together. So this is now a 1 1/2" thick MTF baseboard.

This should support the heavy E3 5x7 Enlarger with no problems, I would think.

Now I will start to put the enlarger together, and see how everything fits together.
 
E3 Ready for Restoration 1 by Nokton48, on Flickr

Here is the 5x7" E3 is rough assembled, ready to start restoration.

The head attached is a home made LED, installed into an original Omega E3 Diffusion Head. It required a shutter under the lens because of the funky bulbs. They had to stay on during printing.

Looks good so far. BTW 16x20s are it for me. So this will do the job.
 
E3 5x7 150 F9 Schneider G-Claron by Nokton48, on Flickr

So now I need some appropriate glass, for enlarging 5x7 negs on the new E3. I went to www.glennview.com and Glenn notes the 150 F9 Schneider G-Claron works well as a 5x7 wide angle unit. It just so happens I have this lens. Once I get a good "fit" on the enlarger I will cut down the board and build the custom table so everything is at a convenient height. No need for a drop table with this one. What other lenses work well for WA 5x7?

I have the 120mm WA Rodagon but I think that's a 4x5 lens? If I'm wrong I'll be delighted.
 
New Enlarging Setup by Nokton48, on Flickr

The DII on the left, is set up to make 8x10s from 4x5 negs, using a glassless film carrier, and 4x5 Omegalite Diffusion Head. Notice the Laser Align tool sitting on the 8x10 Speed Easel. The DII on the right, is set up make 5x7s from Minolta 16 negatives, using the Modern Enlarging Systems LED Diffusion Head and a dedicted 16mm film carrier and lens, which replaces the regular enlarging lens. This will be fun. And this is why I love having multiple enlargers.

New Enlarging Area Roughed In by Nokton48, on Flickr

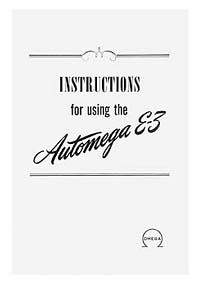
The big new Automega E3 5x7 Enlarger will probably end up in the back corner. As you can see I have moved some storage shelves around. Working to clean up the E3, I did buy an original E3 instruction book from KHB Photographix. I'm also repainting parts of the E3, removing also a lot of rust and dust. I have completely cleaned up the enlarging cones for the 135mm and 190mm Wollensaks. Also trying other lenses to see what works well with 5x7 negs.
 
100 SCREWS ????? You may unseat me as the "King of overbuilders" with that one, Dan!


I may cut it down. It's NOT coming apart :) After the initial cleaning is done, I need to build a 2x4 table to go under it.
It will prolly end up in the far right corner of the darkroom.
 
I'm buying some old Omega E parts from Glenn Evans, and I inquired about having him rebuild this Omega E-3 5x7 glass carrier unit. I don't have all the parts, he will have to make the clips, etc. So the carrier is on it's way to Glenn. He had built a number of custom things for me in the past.

www.glennview.com

I do have the original instruction book (from 1947) coming here soon.
 
E3 Finally Installed by Nokton48, on Flickr

I've cleaned up the Automega E3 to the point it could be installed downstairs. Right now it is set up for 4x5 Condenser printing. 5x7 I will work on as new parts arrive. Needs aligned but looks pretty good with the 190mm Wolly. Image fills the baseboard left to right with 4x5 neg. 5x7 projection will require the longer easel; I'll cut it down after I figure it out.

I'm ready to start printing again, I've been recently distracted with home repairs and such. Picked up some more Multigrade developer and another 100 sheets of 8x10 Promaster VC RC yesterday.
 
Back
Top Bottom