matthewm
Well-known
Hello all,
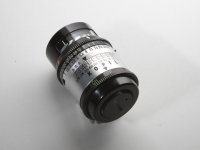
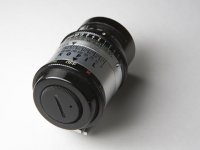
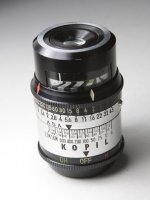
I was at an estate auction today and purchased a Yashica Electro 35 GT in absolute MINT condition with what they described as "random accessories." Upon getting it home, I unpacked the camera, a Toshiba flash, a Yashica ST-7 mini tripod and this strange little Kopil light meter.
I replaced the battery in the meter with a Wein MRB625 and voila!, the little needle moved and reacted to me covering and uncovering the cell.
Does anyone know anything about this meter? I think I have a general idea of how to use it, but an instruction manual would be nice. I have an old Pentax Spotmatic SP and, surprise, surprise, the light meter has gone bad in it. I was about ready to shelf it, but being that I've got some great Super Takumar glass, I thought this little meter might get the camera out and about a little more. Any help would be greatly appreciated. It's not the KOPIL P model as I've found plenty of info on that.
I've posted pictures below so that you can see them and maybe get an idea of what it is???
Thanks in advance,
Matthew