Don't use auto exposure. You're probably not getting the entire tonal scale of the negative. Here's what I do regarding exposure, color balance etc
1) Set camera to auto WB. If you know the color temperature of the lamp you can set a custom WB, but I haven't noticed an issue with auto WB. All other settings manual (shutter, ISO, aperture)
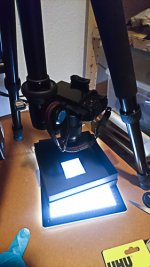
2) find an area of the neg which shows the film base and take a picture. I like the area right before the first frame/after the black film leader. You can use the spacing between frames too but this might confuse you for the later steps. The more clear film base you can get in frame the better
3) now go to playback and look at the histogram. Make sure you're looking at individual RGB histograms and not the combined one. This is REALLY important! The exposure you want is one that is going to push the histogram as far to the right as possible without clipping. On my Nikon clipping first, begins on the blue channel. Keep adjusting the exposure via ISO/shutter speed/aperture until you get this. I normally stay at base ISO and f8 and mess with the shutter speed.
4) Once you find the correct exposure use this to scan THE ENTIRE ROLL. You don't need to change anything (maybe focus if using MF)
5) Once you import all the images to LR/PS or whatever PP software you use, open the first image (the one where you found the correct exposure). Use the custom WB tool (eyedropper on LR) to set WB to the film base. Now apply to the entire roll. That should have gotten rid of most of the orange mask in color neg film. Now invert, adjust levels and WB to taste.
I'd like to add that I saw this done on a blog post (can't find the link anymore) and it has worked perfectly for me. All these comments on WB being off makes me smile now