how to choose the times for split filter printing

Hi Erik,

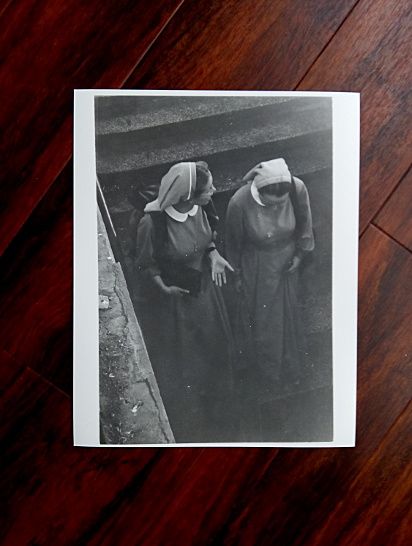
I really want to hear your opinions on how to choose the right exposure for each filter like Mike mentioned above. Do you agree on what he said?

Very easy: first I determine the lightest spot on the photograph = the darkest spot on the negative. I decide if I want this spot to be white or slightly toned. Then I make a test on a small piece of paper to find out the shortest possible exposure time. I make a complete test with both exposures, with both filters, 00 and 5. I make also a test for the darkest part of the picture.

For variations of the light tones the exposure with filter 00 is relevant and for variations of the darkest tones the exposure with filter 5 is relevant, but tests must be done with both exposures. One exposure only is not of any help.

I do not understand the writings of Mike. It is difficult to write about visual experiences. Maybe it helps me to write about split grade printing that I am a professional writer (in Dutch).

Erik.
 
I am not arguing with this for you. And Erik's prints look great, I just don't see anything in them that comes from split grade printing.

Modern papers don't need different exposures with different contrast grades, in my experience. But it also depends on the light source and the paper.

In years of darkroom printing, including 10+ years working professionally printing other people's photos, having to stop, change filter and re-expose would have cost me way more time than exposing once. I really don't see how it would be faster.

Marty

Like I said, in unmanipulated prints there isn't a difference. We are both in agreement on that.

As far as speed goes, it just depends on your experience. An inexperienced printer needs to figure out contrast and time. If he starts with one filter he can figure out the time with the first test strip but not the contrast. Then he makes a print and it has the wrong contrast. Back to square one. Then he changes the contrast but that will affect the time as well. Chasing his tail. With split printing he just needs two test strips and he is pretty much done. So it is faster to arrive at the end point. The majority of time in the darkroom is spent standing over trays. Changing a filter only takes a second. If it saves you from making a test print or two, then the timed saved is pretty significant.

The big advantage of split printing is in manipulating an image, especially with highlight contrast and shadow contrast. Burning and dodging with one exposure does not affect the other exposure since you are manipulating different layers in the emulsion. There is a reason why every good printer I've ever met uses some form of split printing. Commercial printers tend to want to make the print fast on as few sheets of paper as possible. Printing fast for other people and printing the best quality for yourself are two different things.
 
With split printing he just needs two test strips and he is pretty much done. So it is faster to arrive at the end point. The majority of time in the darkroom is spent standing over trays. Changing a filter only takes a second. If it saves you from making a test print or two, then the timed saved is pretty significant.

The big advantage of split printing is in manipulating an image, especially with highlight contrast and shadow contrast. Burning and dodging with one exposure does not affect the other exposure since you are manipulating different layers in the emulsion. There is a reason why every good printer I've ever met uses some form of split printing. Commercial printers tend to want to make the print fast on as few sheets of paper as possible. Printing fast for other people and printing the best quality for yourself are two different things.

100% agreed.

As I said, split grade printing was invented in commercial labs in Paris, Picto. (Pictorial Service, Gassman)

Erik.
 
Just wait until you see the results.

Valoy's and Focomat Ic enlagers can be had here, in Amsterdam, for under EUR 100 including Focotar.

Erik.

I'm re-convinced to try SP again, since I was able to get more about it in this thread.
Not sure if Focomat really worth it if I have working enlarger with latest Nikkor 50 2.8 lens. Is it going to be really different?
 
That is my print with split filter method. I am a beginner and this is my first print of this shot and 6th split filtering experience or so. Yellow cast is due to mobile phone camera.

I learned how to do split grade printing from YouTube videos. There was a steep learning curve but it worked well for the majority of the negatives. But when I tried to print more difficult negatives it felt as if I was going back to square one quite disappointed. The following print was my 6th or 7th attempt to get an acceptable print (the negative is heavily underexposed).

Bottom line is that the more you print and the more difficult pictures you start printing the more likely is that you will reach the same tips and tricks that the more experienced members of this forum report.

IMG_20180721_153613.jpg
 
Long ago I cut strips of Ilford poly multigrade filters and mounted them to a 3x6" piece of Plexiglas. I put a 1 stop ND filter over grades 0-3, and left grades 4 and 5 without, as the Ilford filters are speed matched. You could throw this over an important area of the negative and and get a good idea how each grade would look on a single strip of paper.
 
I'm re-convinced to try SP again, since I was able to get more about it in this thread.
Not sure if Focomat really worth it if I have working enlarger with latest Nikkor 50 2.8 lens. Is it going to be really different?

The only things that matter for an enlarger are alignment and evenness of light. Do you need a Focomat? No. They are nice though. There are a lot of nice enlargers. It just ends up coming down to what you like. The Focomat has autofocus once it is set up, so that is nice. It saves about ten seconds of focusing...

As far as your lens goes, my Focomat has a Nikkor on it right now. I have a ton of enlarging lenses. Very little difference between them. All the good ones are good. Even some "bad" ones are good for some purposes. Don't believe everything you read on the internet. Most people don't have any real experience with things. They just regurgitate what someone else regurgitated. If you have a Nikkor there is no point in changing it unless it is dirty or the elements are not optically centered. Odds are it is fine.
 
Mine is Vivitar. Stable, no shake, no head bottom drift. It has filter drawer above the lens.

Just like on this photos, even same easel.
https://www.flickr.com/photos/carakuhl/albums/72157619326458059/

I think it is an excellent set. (I love the time-o-light, I had one fifty years ago).

A timer with a memory for several different exposures is very handy.

You only need a set of Ilford filters and some variable contrast paper.

remember: use only the filters 00 and 5

When switching the filters, the enlarger and the easel may not move.

Erik.
 
I started with that Vivitar enlarger in 1985. Do not do split printing and use the filter holder above the lens, it always seemed to loose sharpness that way. Much better results were obtained just holding the filter(s) below the lens. As an aside; if you take an unexposed and developed strip of film and make very fine marks on it with a needle or pin vertically and horizontally in a checkerboard pattern you can test it very easily for proper alignment. You can either check it with grain focuser or make a print and inspect.
 
I think it is an excellent set. (I love the time-o-light, I had one fifty years ago).

A timer with a memory for several exposures is very handy. You only need a set of Ilford filters and some variable contrast paper.

remember: use only the filters 00 and 5

When switching the filters, the enlarger and the easel must not move.

Erik.

I started with that Vivitar enlarger in 1985. Do not do split printing and use the filter holder above the lens, it always seemed to loose sharpness that way. Much better results were obtained just holding the filter(s) below the lens. As an aside; if you take an unexposed and developed strip of film and make very fine marks on it with a needle or pin vertically and horizontally in a checkerboard pattern you can test it very easily for proper alignment. You can either check it with grain focuser or make a print and inspect.

I use this enlarger for some years now. No alignment problems on prints.
And I have both Ilford filters one for enlarger drawer above lens and one set with filter holder under the lens.
 
Like I said, in unmanipulated prints there isn't a difference. We are both in agreement on that.

As far as speed goes, it just depends on your experience. An inexperienced printer needs to figure out contrast and time. If he starts with one filter he can figure out the time with the first test strip but not the contrast. Then he makes a print and it has the wrong contrast. Back to square one. Then he changes the contrast but that will affect the time as well. Chasing his tail. With split printing he just needs two test strips and he is pretty much done. So it is faster to arrive at the end point. The majority of time in the darkroom is spent standing over trays. Changing a filter only takes a second. If it saves you from making a test print or two, then the timed saved is pretty significant.

The big advantage of split printing is in manipulating an image, especially with highlight contrast and shadow contrast. Burning and dodging with one exposure does not affect the other exposure since you are manipulating different layers in the emulsion. There is a reason why every good printer I've ever met uses some form of split printing. Commercial printers tend to want to make the print fast on as few sheets of paper as possible. Printing fast for other people and printing the best quality for yourself are two different things.

Exactly what I faced and got discouraged as a novice printer. Thanks to split printing, I get at least satisfactory results for myself and enjoy. You summarized very well the speed of the split printing due to the reasons mentioned. Shaking and deciding on the split exposures are two things I need to practice. I print in bathroom, enlarger on a shaky foldable table and filter drawer is not smooth. Still I like split printing more.
 
Excellent teaching by Erik. A few comments, no critique, from my end.

The Filters 00 and 5 of course are also present in a dichroic color enlarger head: max Yellow and max Magenta respectively. Don't use the cyan.

If you consider buying a filter set, Rosco (from the theater or cinematography world) are very economical. They are relatively large, so can be cut to size. An example would be R80 (primary blue) as your no. 5, and R91 (primary green) as your no. 00.

The Heiland Splitgrade Controller unit does not let you change the Y (00) and M(5) settings independently (via a time consuming detour it is possible but not practical).
Both 00 and 5 will change when you change the Grade option. That's why you have to key in the paper brand/type you use, then the manufacturer decides on the filter settings. So you lose some control here.
Apart from Grade you can also change the Exposure Time with the Heiland unit.

The Heiland settings as achieved by the probe (part of the system,"reads" your projected negative) need fine tuning because your print contrast, also depends on which developer you use, time in the solution, temperature etc.
 
Hey Erik, I've been reading this thread and your advice, and would love to see your results, but most of the image links don't seem to work. Any chance you are able to fix them?

Yes, one of the best things about this forum is Erik’s photos (however they are printed). And one of the worst things is that Erik, with quite a few of his photos, deletes them or moves them on FlickR, breaking the links in the forum.

There was a photo of his, taken with the Cooke Amotal, on (I think) a bus or tram, that was just perfect. And now it is gone...

Marty
 
Back
Top Bottom