Camera-Scan Challenge for Color-Neg, as Automatic as Possible

Jack, could you post again a link to your curve for inverting the output of Camera Raw (that is, a gamma encoded image)?

Below is inverted log curve - you only need levels and saturation (also included in ZIP package). This curve only works for linear 16-bits TIFF files.

https://drive.google.com/file/d/1ndXTO0eZUZLd7TGZ7DKesvpTnADdb414/view?usp=sharing

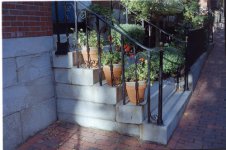
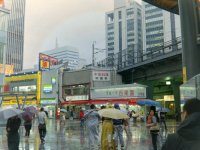
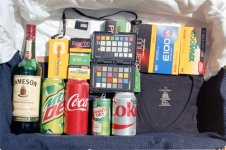
Conversion of your last images below. Ektar requires 50% less added saturation and has better reds separation.
 

Attachments

  • 100918-Fr19-3000k-NoFilter-DSC0004.tiff.jpg
    100918-Fr19-3000k-NoFilter-DSC0004.tiff.jpg
    40.7 KB · Views: 3
  • 101026-Tokyo-Fr6.tiff.jpg
    101026-Tokyo-Fr6.tiff.jpg
    45.3 KB · Views: 3
  • 171004-TestBox-Ektar100-NoFilter-DSC9554.tiff.jpg
    171004-TestBox-Ektar100-NoFilter-DSC9554.tiff.jpg
    45 KB · Views: 3
Below is inverted log curve - you only need levels and saturation (also included in ZIP package). This curve only works for linear 16-bits TIFF files.

Jack, so, to use the curve:
- Make a linear tiff with MakeTiff or draw
- Open in Photoshop
- Curves... use your .amp file (result looks awful)
- Make an "Auto" adjustment (result looks pretty good)

Is this about right? (I'm not going to play with channel mixer.)
 
as Automatic as Possible

My solution, I would find an envelope of appropriate size for the quantity of negatives and send them to be scanned.

Developing and scanning was expensive when I was film based with my business because I could be more productive with my time. Cost was built into the price a client paid.
 
Below is inverted log curve - you only need levels and saturation (also included in ZIP package). This curve only works for linear 16-bits TIFF files.

https://drive.google.com/file/d/1ndXTO0eZUZLd7TGZ7DKesvpTnADdb414/view?usp=sharing

Conversion of your last images below. Ektar requires 50% less added saturation and has better reds separation.

Wow. Thank you so much for sharing! I've being experimenting with digital camera scans for a while now. I've tried your method of dcraw+conversion curve on my files and it delivers the most consistent and believable result of all.
 
Jack, so, to use the curve:
- Make a linear tiff with MakeTiff or draw
- Open in Photoshop
- Curves... use your .amp file (result looks awful)
- Make an "Auto" adjustment (result looks pretty good)

Is this about right? (I'm not going to play with channel mixer.)

Exactly. I've used Saturation AIMRGBpro +100.cha except Ektar that was +50 only because saturates quicker.
 
Wow. Thank you so much for sharing! I've being experimenting with digital camera scans for a while now. I've tried your method of dcraw+conversion curve on my files and it delivers the most consistent and believable result of all.

+1 on Wow. I finished version with Jack's presets (plus some fine tuning) and then opened previous version... damn I liked it before but now it looks awful compared to new one (I had same reaction before, when I used SF instead of flatbed Auto).
 
You only need carefully adjust white/black points and sometimes R or/and B gamma. Log curve keeps film character.
 
Log curve keeps film character.

I am in complete concurrence. When I did camera-scan with simple (linear) inversions, the results looked sort of OK, good contrast, the darkest and lightest areas were OK, but everything in between was off-key. Arguably correctable, maybe livable, but off-key.

Jack's curve was an eye-opener. Then my exploration of ColorPerfect. And, then learning that I could read the linear-tiff in Vuescan. Apparently, same is possible in Silverfast. My net: All of these produce markedly better results than the simple inversion.

My net-net:
- Shoot in RAW
- Make a linear tiff (dcraw or MakeTiff)
- Do the non-linear inversion (Jack's curve, ColorPerfect, VueScan or Silverfast)
- Apply PhotoShop "Auto" (Auto Contrast, Tone, Color or Curve... Option-Auto)

I believe that any of the above will produce an image that's about as good as the Mini-Lab and will be a good base for further adjustment.
 
This is what I got using ColorPerfect: just opened and lightened slightly:
 

Attachments

  • 171004-TestBox-Fuji200-SonyNoFilter-DSC9558-rawNeg-Scr[1]xx.jpg
    171004-TestBox-Fuji200-SonyNoFilter-DSC9558-rawNeg-Scr[1]xx.jpg
    48.2 KB · Views: 3
John, I think ColorPerfect gives very good results, your example is excellent all the way around. I had to add Saturation to get the good reds.

I've never done a C-41 with a digital DNG file and then used MakeTIFF for a TIFF file. And then open in PerfectRAW, but at some point you will have to invert, but when I don't know.

So for that file I used ColorPerfect's ColorNEG.

I didn't want to add Saturation because that is a personal taste decision.
 
Exactly. I've used Saturation AIMRGBpro +100.cha except Ektar that was +50 only because saturates quicker.

Jack, can you explain the Channel Mixer presets you have shared. There are 200 items, ranging from -100 to +100. It appears to me that these are presets to add/remove different degrees of saturation. Like PS or LR's saturation adjustment, but with slightly different effect.

Are these general, that is, a better way to add/remove saturation for all images?

Or, are these specific to film? That is, purpose-built for adjusting saturation in film scans?

Also, FWIW, I can match your result for the "steps" image, and it's very good, but only with a linear tiff produced by dcraw.

- Make a linear tiff with dcraw -v -w -H 0 -o 0 -q 3 -4 -T fileName
- Open in Photoshop
- Curves... use your c-log-rev-inv.amp file (result looks awful, bluish haze)
- Channel Mixer with preset AIMRGBpro +100.cha (more sat, but still awful)
- Make an "Auto" adjustment (result looks very good)

When I do the same with a linear tiff from MakeTiff, highlights are blown and color-cast.
 
... at some point you will have to invert, but when I don't know.

So for that file I used ColorPerfect's ColorNEG.

I didn't want to add Saturation because that is a personal taste decision.

When I mentioned ColorPerfect, I'm using their current naming. The old ColorNEG is an option in ColorPerfect, that's what I used.

My steps for this route:
- Shoot RAW, whatever camera, I get a .ARW, but a .DNG works as well
- MakeTiff
- Open in Photoshop.
- Filter... ColorPerfect... ColorNeg, adjust to taste
- Probably add Photoshop's "Auto"

For some reason, I had to add saturation to get a result that looks like yours. Don't know what's different.

Don't you have to open your MAKE TIFF file in PerfectRAW? I'm surprised that it would come out at all. But like I said above I've never tried it.

When I said, 'So for that file I used ColorPerfect's ColorNEG.' I used your jpeg file not the DNG file.

I copied your negative shot off my screen.
 
@ColSebastianMoran that's my current workflow as well. However, I have not yet tested whether the scanning light source is a key variable here. I have found the white balance is a hit or miss from a straight conversion via ColorPerfect. Most of the time I have to tinker with it to get the desired color, either in ColorPerfect (by clicking a neutral grey area), or in Lightroom.

What are your thoughts on nailing the white balance through a more auto method?
 
Don't you have to open your MAKE TIFF file in PerfectRAW? I'm surprised that it would come out at all. But like I said above I've never tried it.

When I said, 'So for that file I used ColorPerfect's ColorNEG.' I used your jpeg file not the DNG file.

I copied your negative shot off my screen.

You worked from a screenshot of my negative? Surprising that it turned out at all.

My ColorPerfect is a Photoshop filter. It has four options: TouchUp, ColorNeg, ColorPos, and PerfectRAW. I've only used ColorNeg.

So RAW -> MakeTiff -> Photoshop -> Filter... CF Systems... ColorPerfect... ColorNeg.
 
@ColSebastianMoran that's my current workflow as well. However, I have not yet tested whether the scanning light source is a key variable here. I have found the white balance is a hit or miss from a straight conversion via ColorPerfect.

"That's my current workflow..." -- Which one? ColorPerfect?

Scanning light source:

I think I get better results with 5500°K than with 3000°K to illuminate the negative. I use flash; one could use daylight. I don't use LEDs.

Looking at histograms with flash to illuminate the negative, red is higher than green, and blue is way behind. I tried rebalancing the source with filters, adding Cyan and some Magenta to give a more even set of histograms. This is like "Expose to the Right" channel by channel.

In my tests, MakeTiff -> ColorPerfect gives a better result without the added filtration on the scanning light source. My guess is that white-balancing at the scanning light source confuses the program.

Color balance? I'm counting on the automation in Color Perfect and I usually add one of the "Auto" options in Photoshop. This is a rough Auto WB, but not as good as our digicams. My C-41 negatives were shot in varying light; should be no surprise that I have to adjust color balance in the end. I haven't started production yet, but I intend to do color balance in Lightroom.

Finally, FWIW, I find I have to add saturation for camera-scans of Fuji negatives, less for Ektar negatives.
 
Back
Top Bottom