DSLR Scans
DSLR Scans
As promised, here a follow-up with full-size picture links and a description of my stitching method.
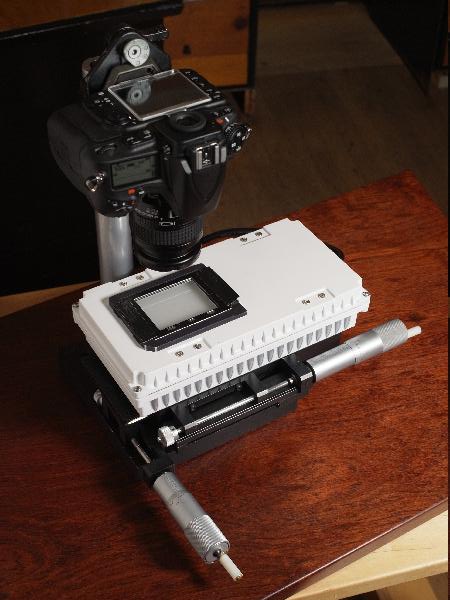
I start by taking four shots of a medium format negative or slide with the setup pictured in my previous post, but the camera moved in closer to the light table. The four shots are from the bottom left and right, then from the top left and right, with a slight overlapping.
I use the XY table to move the lightbox (which is mounted to the XY table) into the appropriate positions. After some experimentation, I realized that the stitching program actually works
better when the overlapping is small, rather then large. I would estimate about 10% overlap works well, if not even less.
Further it is important to put the camera into manual mode. All four images need to be exposed exactly the same. If possible, I let the camera use autofocus, which in some situations is difficult (e.g. if there is only sky).
Otherwise the camera settings are: Aperture of 6.3, Kelvin white balance of 4700K (which corresponds to my halogen light bulb), matrix metering, 64 ISO, Image Quality is RAW, and the Image Area is set to 5:4, which works best for 4 "tiles".
The stitching program I use is called "Image Compositor". It's a free program, from Microsoft. I have tried the praised Hugin stitching program, but found it to be overly complicated; I had difficulties getting good results. Image Compositor on the other hand is extremely simple and straight-forward, with only a few setup options. Of the 20 stitches or so that I have made, there were only one or two where the stitching did not work. I highly recommend the program. Unfortunately it works only on Windows (I run Windows from within Linux... cumbersome, but works).
The one caveat with Image Compositor however is, that it does not stitch RAW files. Thus I have to convert the original scans to TIFF files first. It is best to simply open each negative in a RAW editor, and save the negative as a TIFF; in other words, it has not worked for me to convert the negative to a positive before stitching.
Once the TIFF files have been created, I open Image Compositor, click on "New Panorama from Images", import the four TIFF files, and let it do its magic. Then I export the stitched file as a TIFF. That's it, there are no other settings necessary.
Next I use PhotoLine to open the stitched image and convert it to a positive with ColorPerfect.
My final edits are then all done with LightZone.
I am very pleased with the results, although I wish the stitching could be done with RAW files—the colors of my one-shot images usually turn out better than the stitched images.
Examples
Here a few examples. All are in full-size, JPGs with "high quality", converted from the original TIFF file. They are not sharpened, only minor level adjustments have been made, and most have their dust specks removed.
Click on any of the small images to see the full-size image. The small images look blurry, not sure why... I promise the big ones don't!
These are all
big files, so be prepared for that...
A creek in Nevada near Capitol Reef. Shot with Plaubel Makina 670 on Fuji Provia 100F, 4x1 DSLR Scan:

An occupied house in Berlin. If you look very closely, you can see a bit of a stitching error in the center of the image, right on the corner window of the first floor, 4x1 DSLR Scan:

Zeche Bochum, Germany. Once a steel factory, now a museum. I am from that area... Shot with Fujica GW670 on Ilford FP4 Plus, 4x1 DSLR Scan:

And finally a one-shot image, not a stitch. A San Francisco Victorian near Buena Vista Park. Shot with Fujica GW670 on Fuji Reala 100, one-time DSLR Scan:

I hope this helped some of you who are investigating the DSLR scanning route. In my opinion, it is totally worth it.
Please don't hesitate to ask questions or critizise my setup. I am always looking for improvements.
And please share your own experience and DSLR scans.


